BLOG
|
DALE NAPIER
As a lawn care service professional from Nixa, Missouri, it is my goal to answer some of the most commonly asked customer questions about lawn care. |
 Smart tech gadgets don’t just come in handy for our home entertainment systems or grocery shopping from the kitchen counter. There are also plenty of clever smart tech devices that help make our home gardens more eco-friendly. Plus, they can help cut back on labor intensive chores that can eat up an entire afternoon on a regular basis. And, finally, there are inventive smart home gadgets that can help us monitor and maintain healthy conditions for our plants, aiding homeowners as we help our plants grow.
So, let’s take a look at four clever and helpful smart home upgrades that can enhance your home’s landscaping. 1. Smart Sprinklers Your smart sprinklers will water the lawn and the garden on a regular timer, keeping your lawn and garden well-hydrated and healthy. But a smart sprinkler system can do so much more than that as well. With automatic sensing capabilities, your sprinkler system can analyze the weather and recognize any leaks in the system. That means that when it is raining heavily, your sprinklers will take a break from watering, so you won’t be contributing to water waste. You can access and adjust your sprinkler system remotely via a Bluetooth connection on any smartphone, laptop, or tablet. 2. Smart Garden and Weather Monitor Every gardener, from the most novice to the most advanced, can benefit from this smart device. A smart garden monitor allows you to track specific factors that can affect your plants’ health, including light levels, moisture levels, and humidity. Your garden monitor will be able to measure the nutrients present (or absent) in your soil, so that you can adjust accordingly to ensure that your plants are being treated to the optimal conditions to support their individual growth. You can track rainfall, heavy wind conditions, and extreme weather events so you know the best possible time to plant in your area. Plus, water level measurements and analysis allow you to understand and adjust how much water is not only present in the soil, but how much water is necessary for each plant. That way, you can adjust your smart irrigation system accordingly, so all your gadgets work together in harmony to create a bountiful home landscape. 3. Smart Lawnmowers Mowing the lawn can really take the joy out of that beautiful lawn that surrounds your home. With a simple smart tech upgrade, you can remove the hours of sweaty labor required to maintain your lawn’s lovely appearance. A smart lawnmower can automatically complete the task for you. Similar to robotic smart vacuums, the smart lawnmower will venture out and cut that grass for you on its own, with little oversight or monitoring required. Most smart lawnmowers come equipped with GPS and connect to your home Wi-fi network, so, you can program them remotely from your smartphone and tablet. 4. Smart Planter For all of the potted plants jazzing up your home landscaping, upgrading to a smart planter or smart plant pot is a great choice. There are a number of options for upgrading to smart pots, including expandable pots. These pots automatically detect when your plant is ready for more room- and it expands accordingly, to accommodate your plant as it gets bigger. Another smart planter innovation comes equipped with a built-in water monitor and alarm system, so you will be alerted if your plants are ever lacking in water or sunlight. Some of these smart planters even come decorated with a sweet cartoon character, whose facial expressions illustrate how happy your plants are inside the pot. Final Thoughts Clever innovations to help boost your home’s landscaping will continue to emerge, with robotic weeders and thermal imaging among the smart home devices that will be released in the near future. In the meantime, try upgrading to some of the gadgets we have listed above. You will be more knowledgeable about your plants’ wellbeing, your plants will be happier, and your home landscaping will have a better impact on the environment. An all-around win-win situation.
0 Comments
 One of the most common question I receive on a weekly basis is "how do I get my mower to cut better". I've also been asked "how do I get my mower to cut like the lawn care professionals." Now there is a big difference between a home owner mower and a commercial mower but I have a few tips that will help you out and give you better results that you are looking for. These tips are easy and any DIY tacklers can navigate these steps to get best out of their mower. Sharpen your mower blades One of the most common reasons why a mower isn't performing the way it should is due to dull blades. The first step to improve the cut quality of your mower is to sharpen your mower blade(s). Dull blade(s) not only result in poor cut quality but can also lead into lawn diseases. How can you tell that your blade(s) need to be sharpened? Look at the photo below. 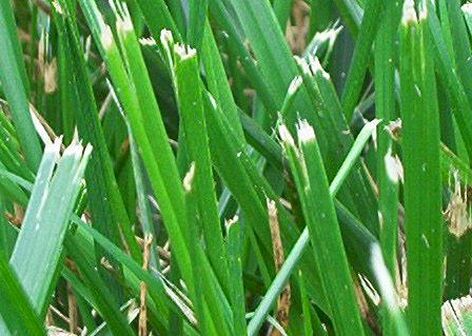 If the tips of the grass looks yellow after cutting, it is a good sign that your blade(s) needs to be sharpened. This is caused due to the grass tearing and not actually cutting. With sharp blades your grass should have a nice flat, smooth, and even cut. One question I get asked quite frequently is "how often should I sharpen my mower blade(s)". There are a few factors that go in to this question. How often are you cutting? Are you mowing over rocks and other debris? These things will take into consideration on how often you should sharpen your blade(s). A good rule of thumb is that you should sharpen your mower blades every 10 hours of use. To learn how to sharpen your mower blade check out this video we have provided for you. If you are needing a tool to sharpen your mower blades here is a link to an affordable set that won't break the budget . Clean the underside of your mower deck 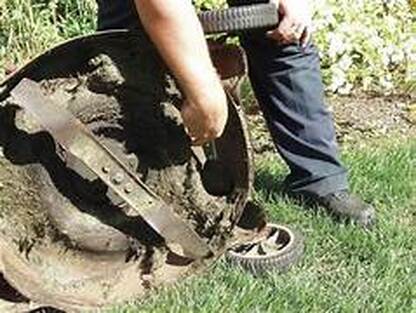 A dirty mower deck is another popular reason why you might be getting poor quality out of your mower. A dirty deck that is caked with grass clippings can reduce the air flow that is needed to side discharge, mulch, or bag the grass clippings. The layer of grass on the underside of the deck can also cause more damage then just a poor cut quality. A dirty mower deck can lead to fungus diseases, weeds, rust to your mower deck, and unwanted pests in your lawn. To determine how often you should be cleaning the mower deck will be based on weather conditions in your area. Here in Nixa, MO it rains quite a bit in the spring and should be cleaned more often then what you would need to in the summer. A few of the signs to tell that your mower deck is dirty without tipping your mower over or jacking it up is to pay attention while you are cutting. If your mower is leaving clumps, this is an indication that your deck needs to be cleaned as the air flow is restricted. Another sign is that if you stop after a couple of passes on the lawn and notice there are some straggling pieces that didn't get cut, its a good sign that your deck is dirty as the build up can slow the speed of blades down as well. The only thing you will need for this task a deck scraper. Adjust your anti scalping wheels 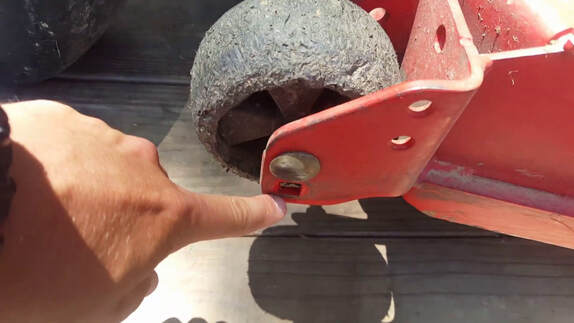 The anti scalping wheels (also known as anti rollers) is probably the most under looked thing on your mower. Now this section of the blog might only be beneficial for you if you have a rider mower. We didn't want to leave you out. Now this took me several years mowing commercially before I even noticed this small change. I knew the rollers were there, but I didn't realize they had to be adjusted to the height you normally cut at. I thought they where pre-set to where they needed to be from the factory. Once I realized that these needed to be adjusted to match my cutting height I saw better results. The anti scalping wheels are designed to help your mower deck to move up as it rolls over a high part of the lawn to reduce the chance of scalping the lawn. In Nixa, Mo and surrounding areas this is very important because of all the rolling hills we have in our area. This is a super easy task to do even if you are not the "do it yourself" type. All you are going to need is to have a few tools that you might have laying around the house already. Make sure your deck is leveled 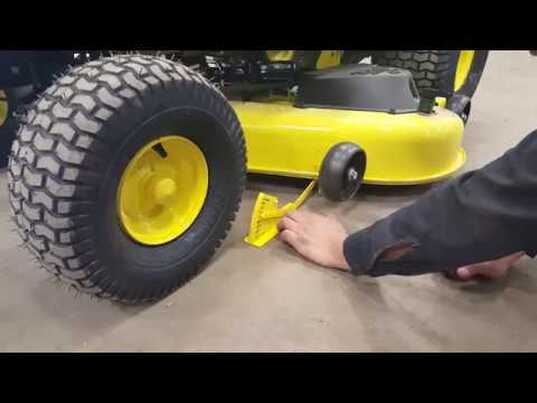 This is another one of those things that is easily looked over. Uneven decks can cause uneven cutting as you can already guess. The obvious sign of an uneven deck is if one side of the pass you just made is lower then the opposite side. Now one of the things you might not know is that your deck should be leveled from side to side but have a small pitch towards the front of the mower. This helps with airflow and the striping ability of the deck. Now the pitch is different for each mower and we recommend that you refer to your owner's manual for the right measurements. You can use a tape measure to level the deck or you could use a bubble level to check the deck as well. Have the correct mower blade for your grass type 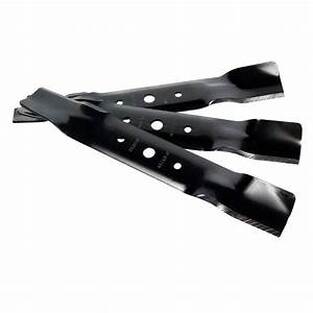 Are you tired of how your lawn looks? Or, do you want to add some flare to your lawn when spring comes? Our customers in Nixa, Missouri for landscape can all agree, everyone wants a beautiful lawn to accentuate a beautiful home. So, we’ve put together some simple, easy landscaping tips to help your yard look incredible!
A little Clean-up goes a Long Way The start to any great landscaping project begins with the not-so fun part. Clean up! Mowing, cleaning up fallen branches, dead plants, and getting rid of anything that you don’t see being a part of your new landscaping vision is an important step to getting your beautiful dream yard. Find a Focal Point First things first, what do you want to be the focus point of your yard? Does your yard have a big item that directs attention? Whether it’s a fire pit, a nice outdoor seating area, or even a large tree, starting with your main area is a great way to figure out which way you want to go with the rest of your landscaping design. Add a Flowerbed Flowerbeds are a relatively easy, as well as attractive addition to any yard! And if you have a green thumb and an eye for color, a very fun weekend project. Flowerbeds are great for curb appeal because their placement is flexible. You can place them around mailboxes, along the side of your house, or around a main focal point of your yard, such as the previously mentioned. Even a small flowerbed with the right mix of color can make a huge difference! Freshen up your yard with fresh mulch Old, weathered mulch can really drag down your curb appeal. A fresh layer of gravel, dark mulch, or even sand is an easy way to get your yard looking fresh again, with the added benefit of protection your plants and preventing weed growth! Plant Native Flowers- If you’d like to opt for a cheaper option with far less maintenance, try planting flowers native to your region! There are a lot of benefits to planting native plants, such as their ability to adapt to our climate and soil, requiring little to no irrigation, and usually having no need for fertilizers or pesticides. Not to mention, they’re good for the bees! For us, in Nixa, Missouri we have a lot of beautiful flowers to choose from, such as Black-eyed Susan, Missouri primrose, Butterfly milkweed, Purple cone-flowers, and many more! We hope we gave you some great ideas in this week’s blog. And, as always, if you are needing help with lawn care in Nixa, Missouri, be sure to call Dales Lawn Service at (417) 414-8355 for a free quote!
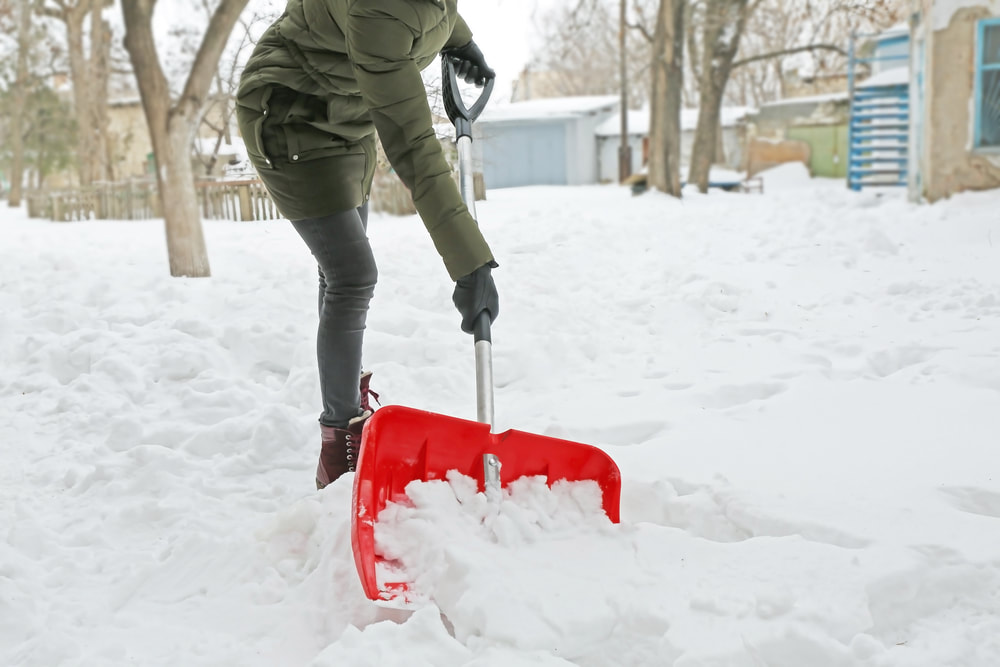
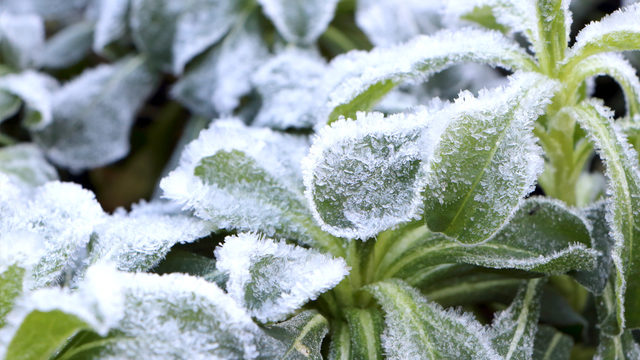
It's cold outside! Luckily, if you're waiting for spring to hurry up and get here so you can get back outside and do some gardening, we've got some tips and tricks to keep your garden alive and well through the cold winter months! 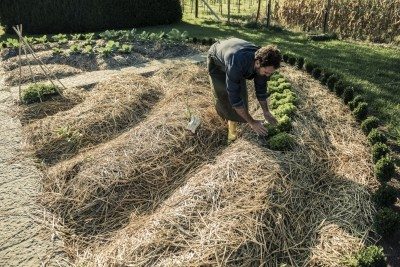 Insulation A 2-3 inch layer of your choice of either mulch, straw, or leaves will help keep your plant's base and root system warm, as well as protect your plants from pelting rain and snow. 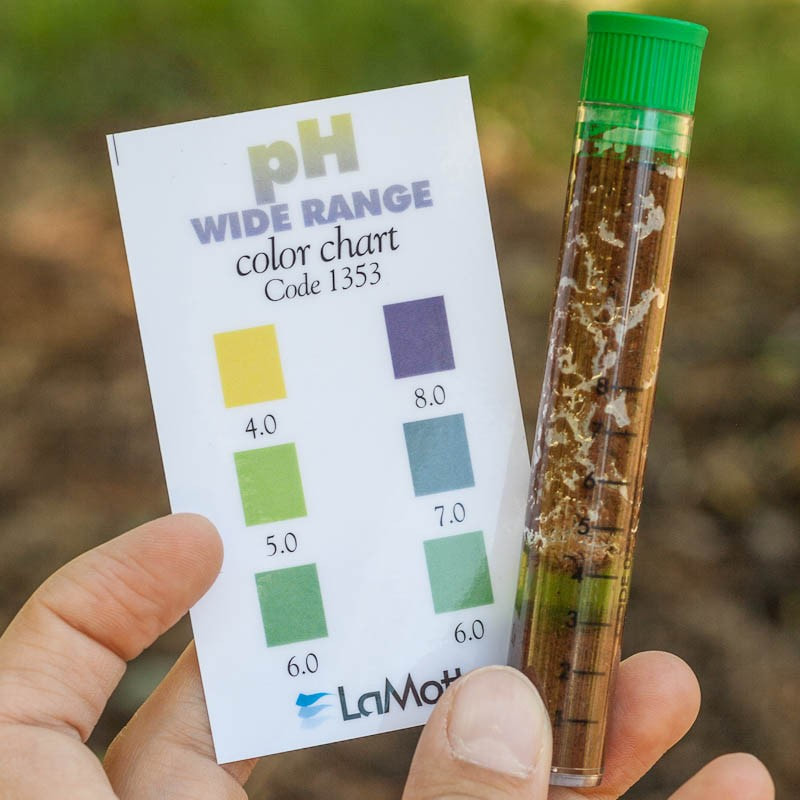 Check your soil Checking the condition of your soil is essential to the survival of your garden. Checking PH levels, soil acidity, and getting your soil tested by your local master gardeners are all steps you can take to ensure that your garden makes it to spring. 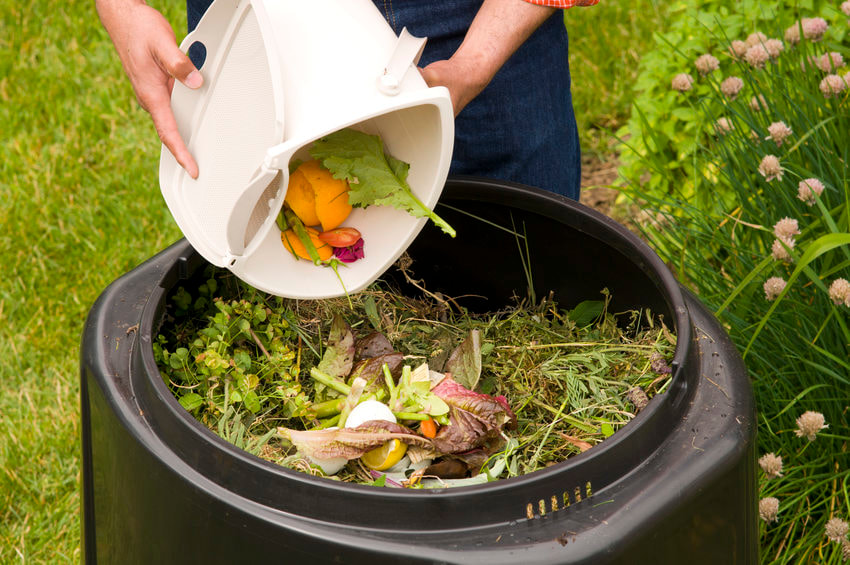 Composting! Spreading compost after fall will give your garden a much-needed boost before spring comes. 3-4 inches of aged compost over your soil will help keep in warmth, and gives your vegetables the nutrients they need to grow big and hearty! 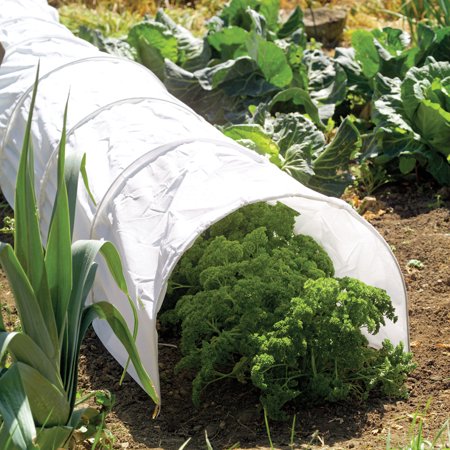 Proper Garden protection For harsher winters, you may want to opt for a little more protection for your garden. The more expensive option would be the classic greenhouse, which absorbs heat and protects your vegetables from the harsh elements. For a cheaper option, a hoop tunnel (heavy, translucent plastic over PVC pipes) works just fine to protect your garden as well.  Get those weeds out!
Work smarter, not harder! Wait until the first frost hits to pull weeds from your garden, they'll come up in clumps. Meaning, less time pulling weeds and more time doing the fun parts of gardening! Hello everyone! It's snowing, it's cold outside, there is certainly no mowing necessary. But while lawn care is on hold until spring, that shouldn't stop you from heading to the garage and doing a little lawn mower maintenance to get it all tuned up and ready for the new season! Here's what you need to do.  Blades Checking your blades to make sure they're sharp is essential to an even, healthy cut for your turf grass. If the blades are dull, the grass gets ripped instead of cut, damaging your lawn. Sticks larger than your index finger, and small rocks will dull your blades faster, so if you've got a rocky lawn, it's good to check your blades often. 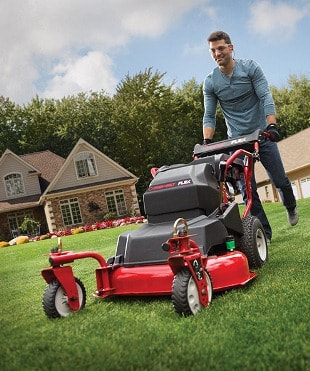 Deck Height Proper deck height is important to ensure that you don't burn or scalp your lawn. If you've got a lot of large rocks in your yard that you've hit over the last season, it's good to check your deck and make sure it's even. Large rocks, stumps, and other obstacles can throw off your deck height. 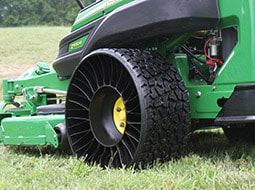 Tires Check tire pressure and ensure its the correct pressure for your tire. Also make sure your tires are still looking good, and don't have any nails or other foreign objects stuck in them. If you hear a hissing in your tire, or your tire is flat often, slightly over-fill your tire with air and pour a bottle of water over it. It will bubble where the hole is, and you can patch it from there! 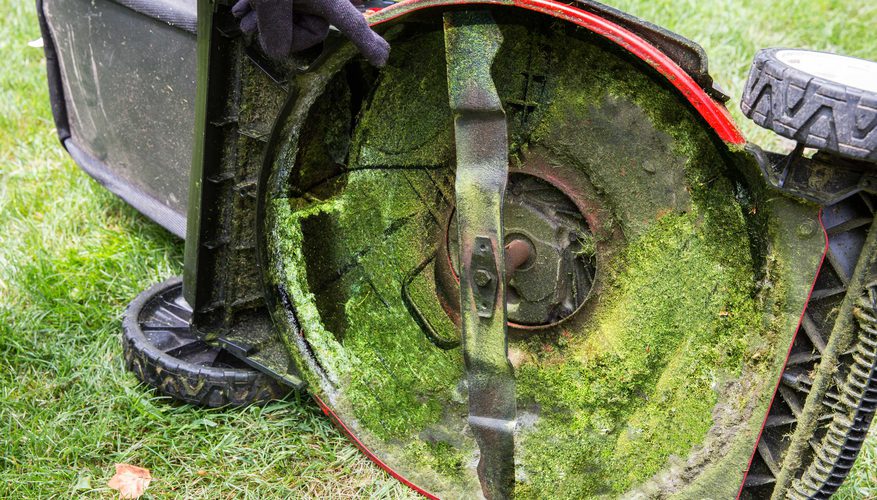 Cleaning bottom of deck Cleaning the bottom of the deck of your mower, and getting all the muck and grass clumps out is important and ensures a clean cut. It also ensures everything continues to work properly on your mower. Grass is acidic, and too much build up under the deck can cause corrosion on the deck. A paint scraper will do just fine getting the clumps out! 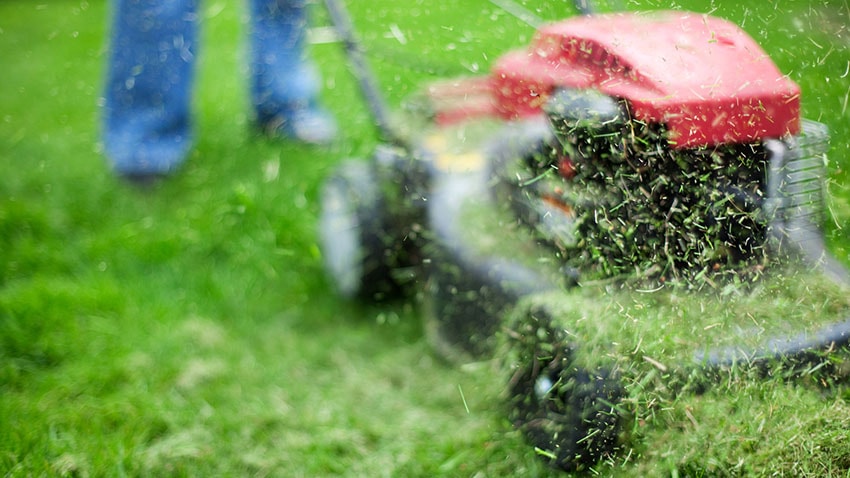 Keep fittings Lubricated
Fittings, right above the fork of your tires, or close to the engine, keep everything moving properly. Each mower is different, so refer to your owners manual to figure out where these fittings are and which ones need to stay greased. Keeping these fittings greased is very important, and proper maintenance of them ensures a long-lasting machine! Pro-tip: Always ensure your safety gear is up to par! Safety Glasses, Gloves, and a good hat to keep the sun off your neck are all very important and you should make sure they're still in good condition for the new season! Hello everyone! This week's blog was written for the sole purpose of getting you excited for the holidays! And of course, with a little bit of plant care mixed in there. Here's a list of the best plants to have around to increase your home's curb appeal, and impress all your family members coming over for the holidays!  Poinsettia Nothing says Christmas like an abundance of poinsettias! And with a little love and carefulness, these colorful plants can remain vibrant and blooming for weeks after Christmas is over. Poinsettias need proper light, water and temperature to hold their bloom. Poinsettias should be watered thoroughly, and kept in semi-cool, humid areas with indirect sunlight. be careful not to over water them, or root rot can occur. Never fertilize poinsettias while they're in bloom, and only do so if you intend on keeping them after the holidays are over. 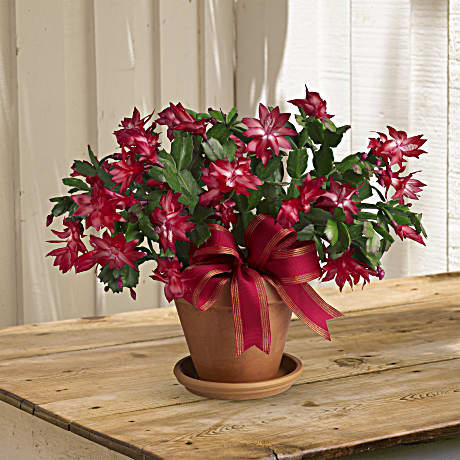 Christmas Cactus Christmas cactus are beautiful, and typically bloom at Christmas! And by doing so, makes it a wonderful addition to any holiday decor. Not only is this plant incredibly easy to care for, but it makes a great gift. As for care, Christmas cactus does well under normal indoor home conditions, and requires little care. Christmas Cactus will produce the best blooms if placed indirect sunlight, and if the soil is kept slightly moist, but letting soil dry out between watering intervals. 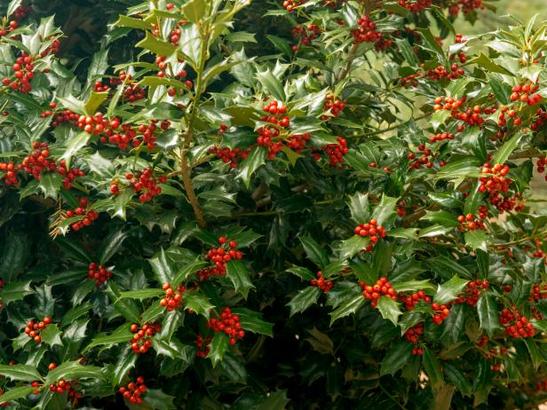 Holly Holly bushes can make an excellent addition to your outdoor garden decor. The bright berries add a beautiful splash of color in the winter, and mix well with other blooming flower come spring. Care-wise, Holly bushes are best planted in spring or fall. low temperature and increased rainfall make it less stressful for Holly. The best location for Holly is in moist soil with full sun, but Holly can adapt in less-than-ideal conditions.  Amaryllis Amaryllis is a big, beautiful addition to any holiday decorations. They make an excellent statement piece to decor, since they bloom big, vibrant colored flowers. As for care, they can be cared for Indoors with a little work, and their bulbs will be ready to bloom around mid-November. Indoor Amaryllis needs to be watered twice a week, fertilized every 2 to 3 weeks, and out of direct sunlight for long portions of time. And if you can do that, you'll have some of the most beautiful flowers you've ever seen! 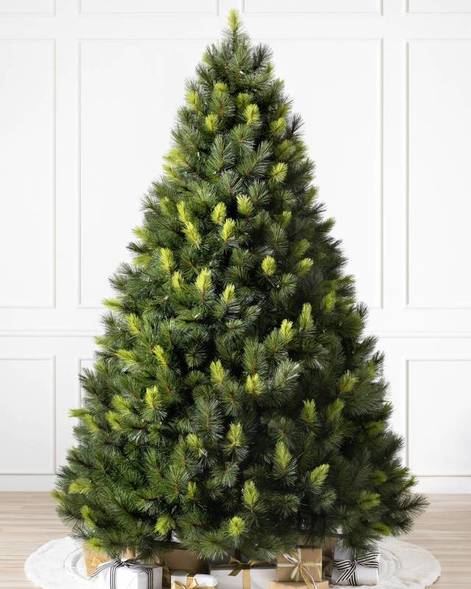 Scotch Pine
Last but not least, the infamous Christmas tree. Christmas trees, either cut or live, are the centerpiece of all Christmas decor. Most commonly used and grown In Missouri are Scotch Pines and White pines. Scotch Pines are found in most of North America, and grows well in deep, well-drained and moist soils, and is highly adaptable. Scotch Pines are often used as Christmas trees, due to them being extremely durable as well as attractive, and are able to withstand indoor conditions for weeks after being cut! Boy, is it getting cold outside! And before that first killing frost comes, heres a fall to-do list to make sure your lawn and garden survive the winter. 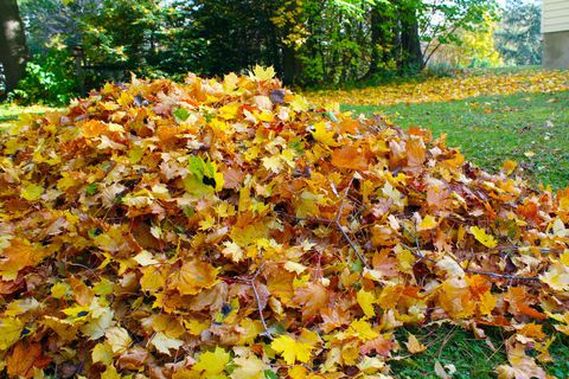 Fall clean-up and leaf removal Fall cleanup is a must before Thanksgiving! Get all those fallen leaves out of the yard, get some new mulch and get rid of the old, weathered mulch. Tree trimming, weeding, and removing old dead plants is important to help your yard return to its formal glory in the fall, and tree trimming should be done late October to November, after all the leaves have dropped and they are dormant. Mulching the leaves in your yard is also a great option for leaf removal, adding nutrients back into the soil and helping your lawn retain moisture. 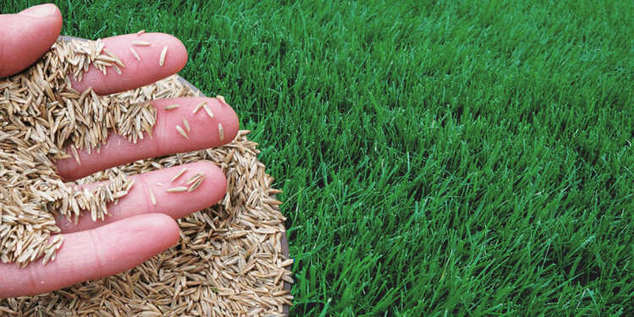 Seed Spreading A dense lawn is good protection against weeds, and over-seeding is important for achieving just that. Fall is great for over-seeding since the air is cool and the soil is still warm. Not to mention it fills in those dead spots on your lawn! Flower clean up and last minute planting. While some plants and flowers are better left alone through the winter, some require a little extra care before the cold hits. Some perennials don’t do so well in the cold and don’t handle frost well, and need cut down in the fall. If you see damaged or diseased plants, be sure to just throw them out. Check each plant you have and make sure that they do or do not need cut back before winter to ensure the survival of your garden! As for new additions to your garden, blackberry lily, blanket flower, daylily, painted daisies, and peonies are a few flowers that require a period of cold to set buds for the following season, and are extremely cold resistant, as well as beautiful! 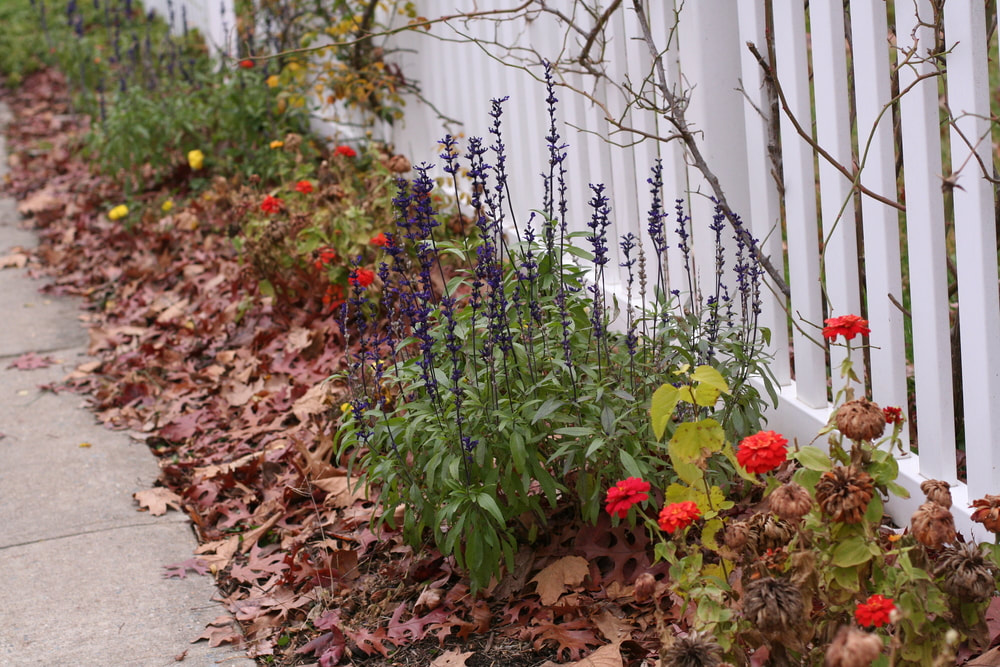 Garden clean up With cleaning up the garden before the snow hits, first things first: Get all the dead plants out. Any plants or vegetables that have been eaten by bugs, diseased, or otherwise didn’t make it need removed and added to a compost pile. Next on the list is weeding. Weeding thoroughly one more time before winter will mean a lot less work for you come spring, and leave more room for your new plants and vegetables to grow big and beautiful next season! Pro tip: If you’re planting new vegetables in the spring, make a note of what plants and vegetables were grown where in your garden. That’ll make it easier on yourself when the time comes next spring, and its never good to grow plants of the same family in the same spot every year, since it depletes the nutrients in the soil quickly. 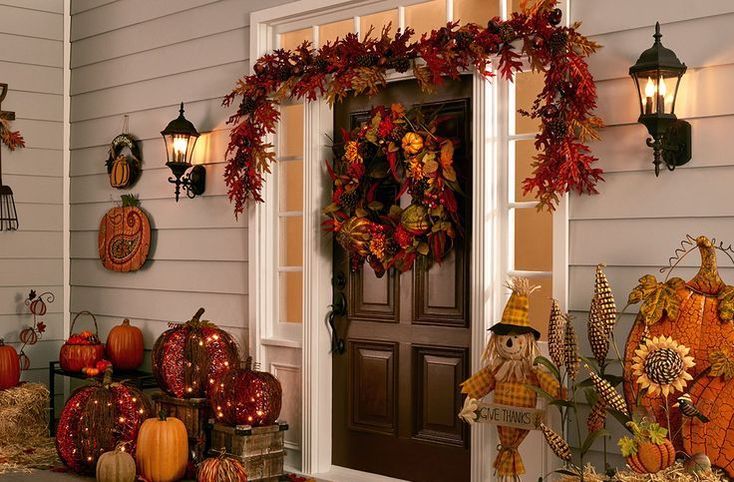 Holiday decorations
If you’re that person who likes to put up Christmas decorations the day after Halloween, we support you! Or if you’re the kind of person who goes for a more thanksgiving feel, we have some ideas for you! A fall weath is a great way to add some color and décor to your yard! And, theyre really fun to make. A hobby lobby trip, picking out your favorite arrangement of fall-color flowers and pinecones is a great way to start. Pumpkins, apples, and cornhusks are also a great addition, looking more natural and definitely festive. Hanging leaves, cornucopia, and rustic décor are also a great additions to your home for thanksgiving, and is sure to wow your family! We all love our four-legged friends more than anything. And more importantly, we want them to be safe. Here are some pet-friendly lawn hacks to keep your yard healthy and your dog happy! 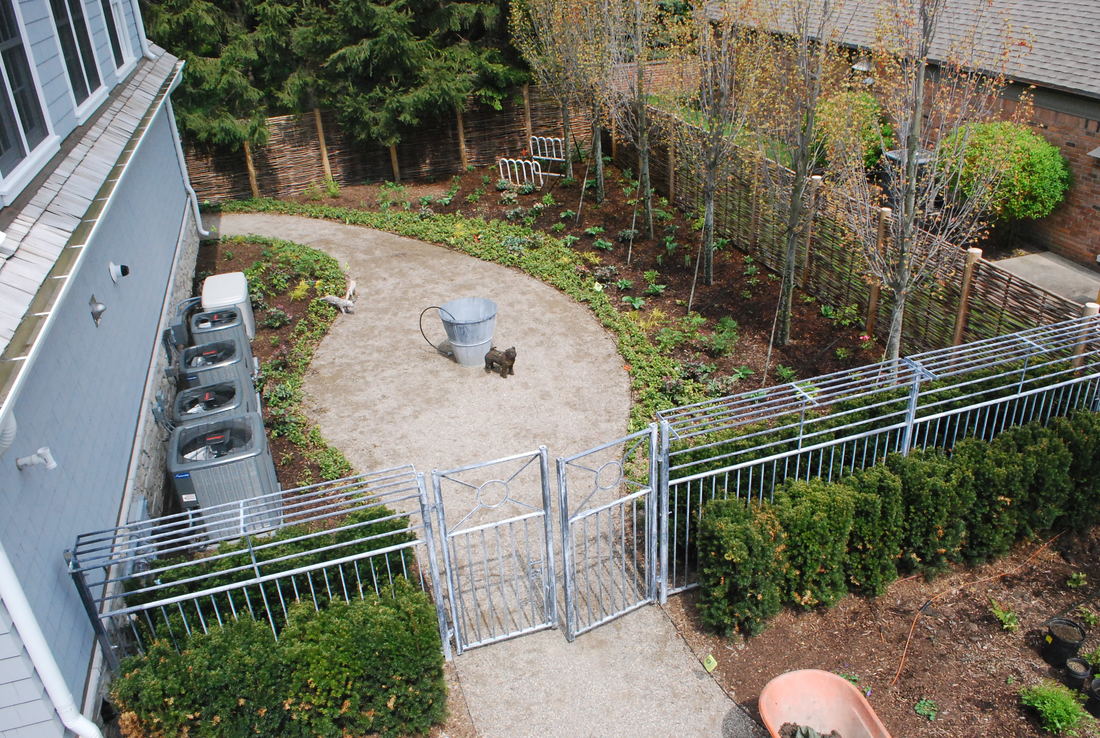 Keep Fido out of the garden! Most dog owners have been there. The garden looks amazing, the tomato plants are doing well, and you just trimmed all the flowers. And then suddenly, they’re dug up and eaten because dogs are dogs. A tip to keep them from using your garden as their own personal salad bar, spray some odors around! Dogs hate vinegar, and it’s a great pet repellent for your flower bed. Marigolds also work, keeping out harmful insects as well. 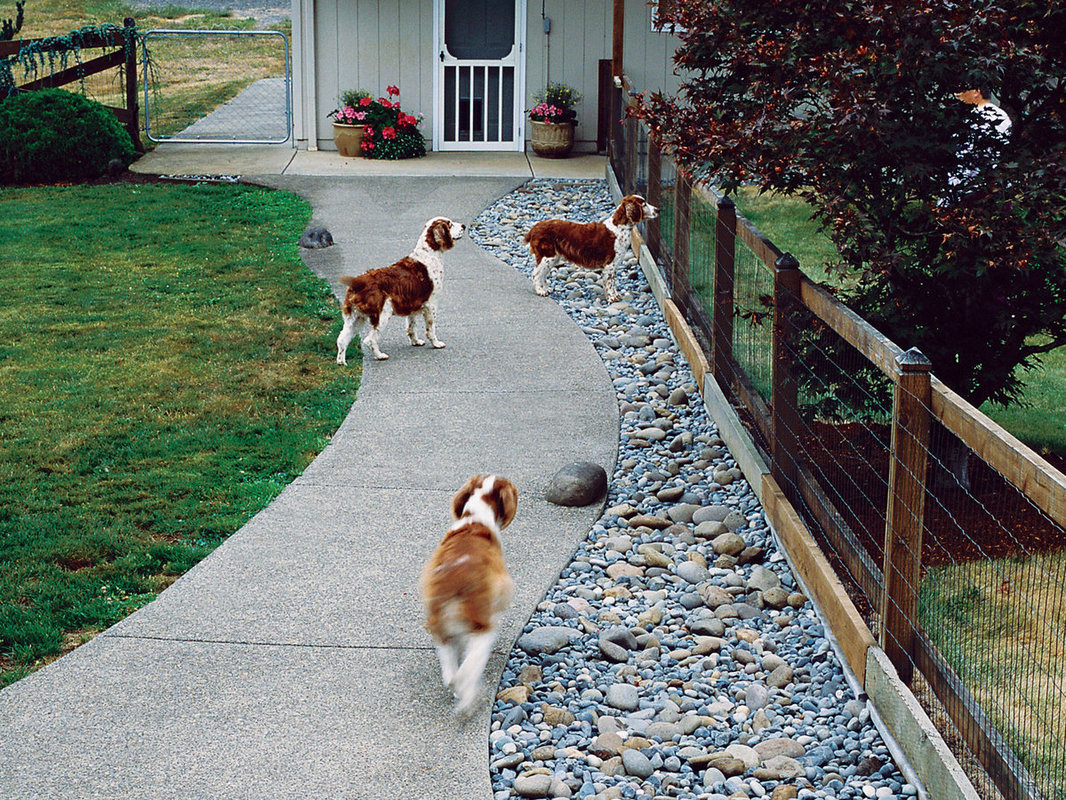 Pet Paths and off-limit areas Many times, with pet owners, you’ve got a certain spot in your yard that your dog has claimed as “Theirs”. Holes, dead spots in the grass, dirt piles everywhere. A good way to fix this problem is a little bit of landscaping! River pebbles are commonly used to give the dogs a good dig space, without hurting their paws or your lawn. Setting some boundaries could also help keep your garden bed alive through the season. A little chicken wire goes a long way, and is great for keeping our rabbits and other pests as well. High Levels of nitrogen in pet urine is what causes those dead spots all over your lawn. To fix this, a designated “potty-area” should do the trick. A small area of your yard, with gravel or mulch and something vertical to help your dog quickly identify the spot should work great to keep your lawn looking good and spot free. Be sure to reward your dog for using the spot when its time to go out!  Keep the grass a little longer The grass in your backyard is your dog’s favorite thing. They love to roll in it, run on it, nibble on it. And keeping the grass around 3 inches is a good way to provide them with a softer bed for their daily dog activities, not to mention strengthening the root system of your grass. 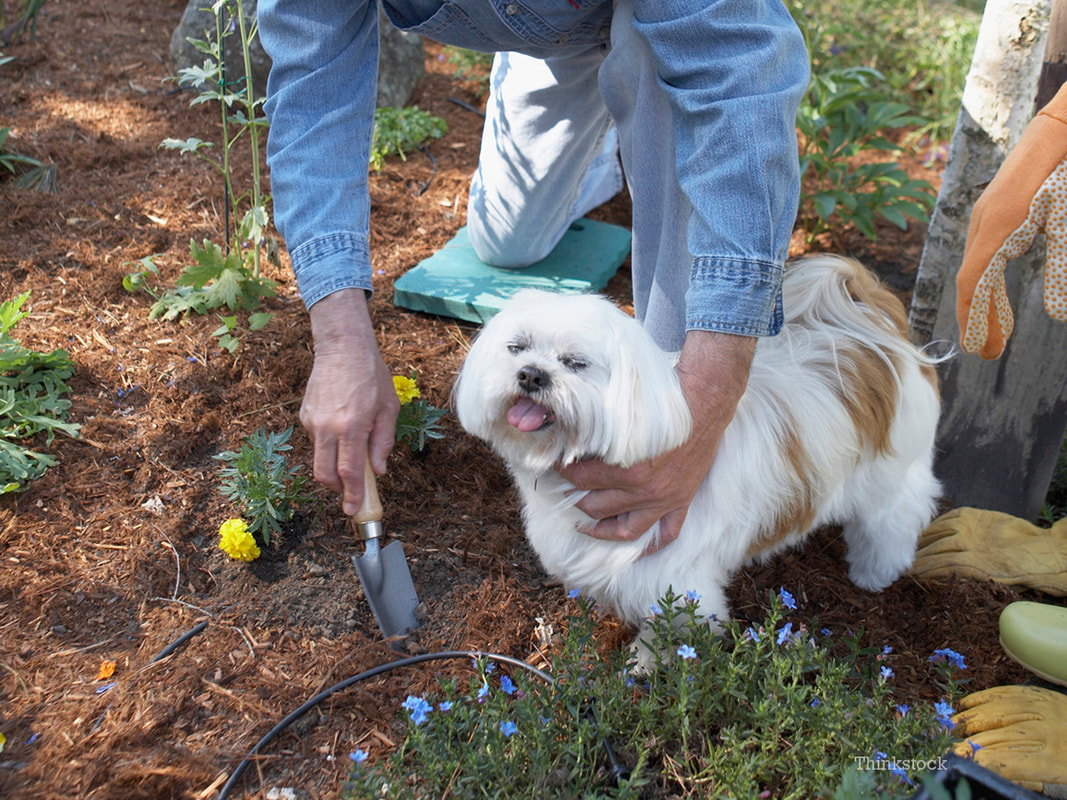 Go Organic While Fertilizer and Insecticides help with keeping pesky fleas and ticks out of your yard, both can be potentially harmful to your four-legged friend. Opting for organic soils with no added chemicals can be a great alternative and leaves you worry-free. Be sure to water after you’re done fertilizing, and wait a bit for everything to dry before you let the dogs out!  Be mindful of the mushrooms
Certain weeds and mushrooms can be very harmful to pets. Just like you pull weeds from your flowerbeds and gardens, be sure to keep an eye out and check around your yard to make sure there isn’t any suspicious fungi growing around within your dogs reach! With that in mind, avoid toxic plants in your flower garden as well. That includes...
Fall is here, and we all know that means winter will be here before we know it. With that in mind, you may not be spending too much time thinking about your lawn, but fall is the best time to start preparing your lawn for spring! Right now, grass is working to absorb nutrients, moisture and energy to prepare for a dormant winter. But with a little love, you can have a wonderful and green lawn come spring! Here’s what you need to know. 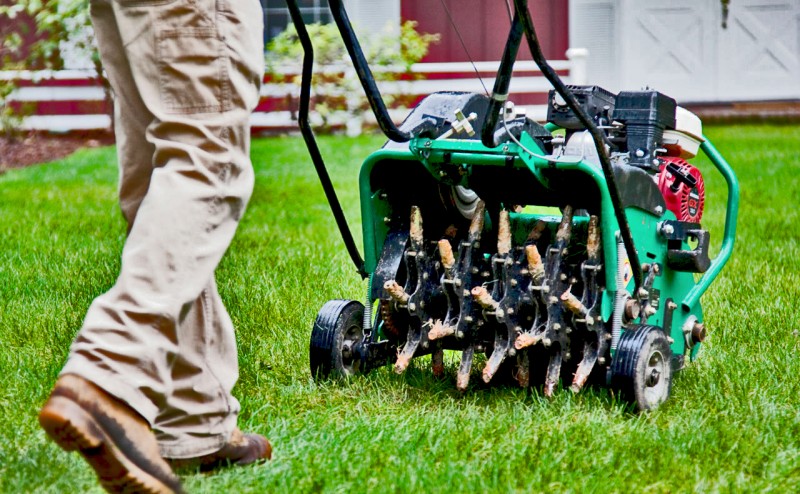 Aerate that soil! It is important to make sure your lawn gets a breather in autumn and winter. Your lawn is needing that oxygen, water and fertilizer in those grass roots. This process of aeration can provide room for seeds to sprout, and new grass to grow and spread, without competing with annoying weeds. If you have kids that like to play in your yard or have an otherwise high-traffic lawn, it is recommended to aerate twice per year: once in the fall and once in the spring. If not, once a year in the fall will suffice. 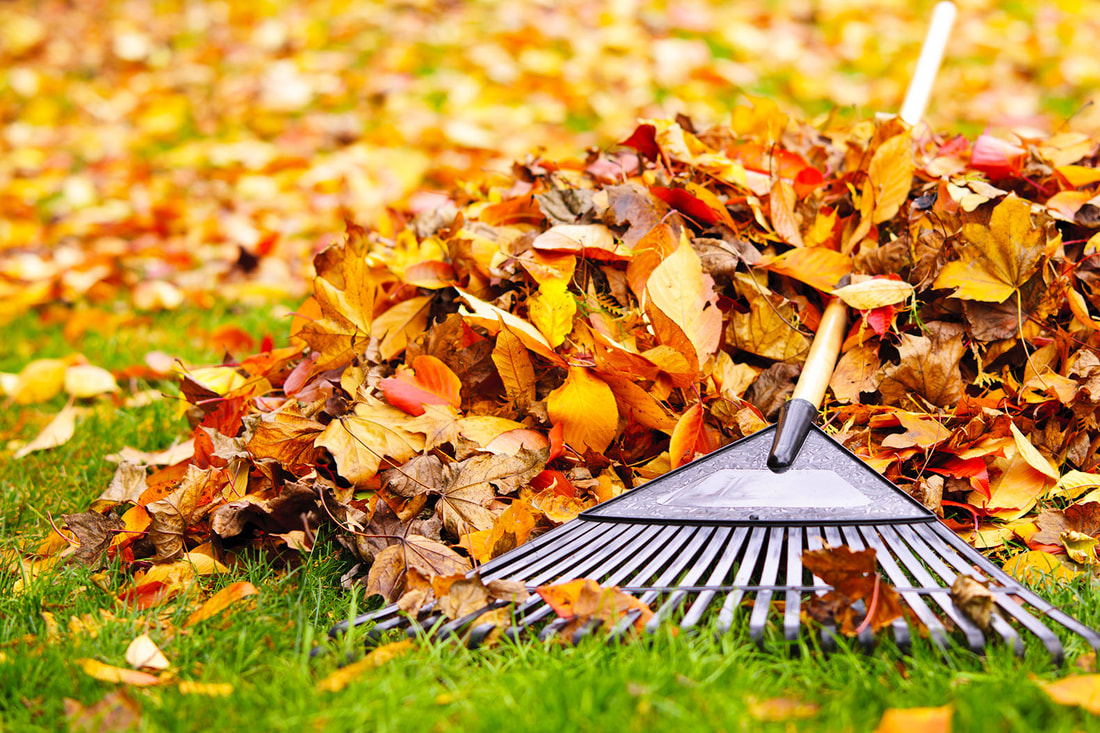 Leaf Cleanup! It’s very important to keep fallen leaves off your lawn. As soon as they start to fall and begin to build up, we recommend doing it as soon as possible. If not, the leaves will become wet and form into a thick layer on top of your lawn, keeping out the sun and oxygen the grass needs. Whether you use a rake, or a lawnmower fitted with a collection bag, be sure to remove the leaves or else the grass under that soggy mess of leaves will be dead come spring. 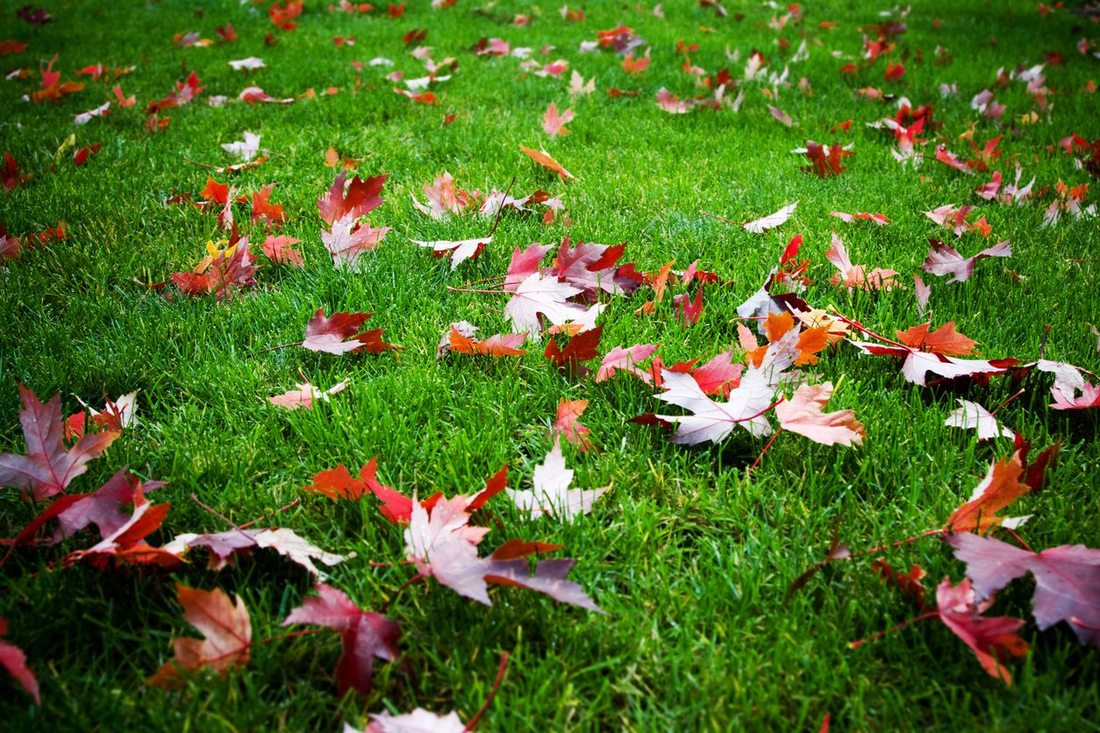 Fertilize! Pro tip; If you only fertilize your lawn once a year, fall is the time. Grass leaves grow much slower in cool weather, but the roots continue to grow quickly. With a fall fertilization, it gives the roots the necessary nutrients they need to form deep roots to keep some nutrients on reserve for spring! 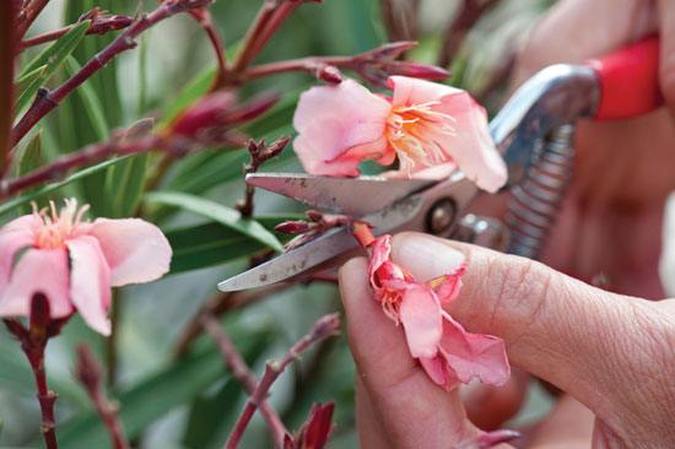 Give the plants a little attention! Cut back dead growth on perennials. Pruning your plants will allow for regrowth come springtime. If you have annuals, you can pull them up once they die when the weather chills, or simply wait until spring. Cover flowers and tree bases with mulch, compost, or dead leaves. For ideal protection from the winter weather, consider buying some nutrient-rich mulch to provide the best care against hard freezes that could kill your plants for good. 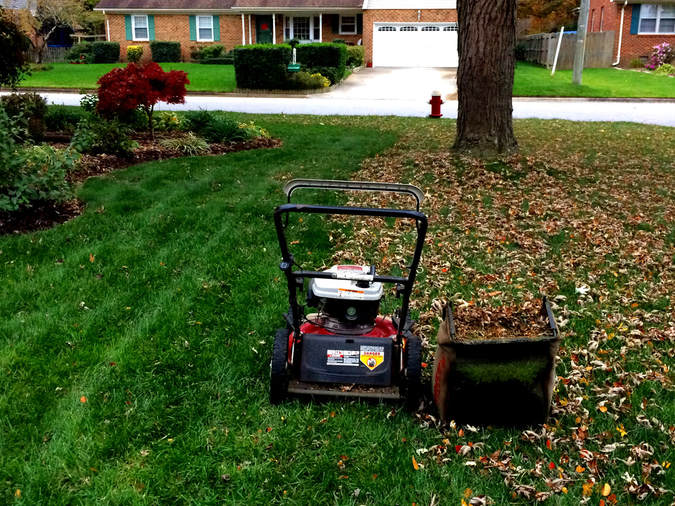 The last mow of the season!
Just because the weather is getting chilly doesn’t mean you have to stop mowing! You should mow your lawn right up to the time it quits growing in the late fall. The grass should be cut to a level of two inches at last cutting. If it gets longer than 3 inches, it can mat. This can lead to lawn disease problems, such as snow mold. If it is shorter than 2 inches, its ability to store food for growth will be limited. A good sign it has quit growing is the absence of lawn clippings when you run the mower. On this week’s tips we’re going to be giving you a few pointers on keeping your yard beautiful and leaf-free this fall season! 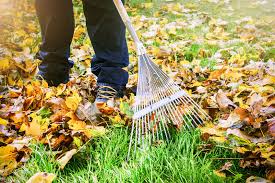 Rakes To start off, it’s about finding the right rake for the job. Finding a good rake that fits your lawns needs is a good way to keep your lawn looking neat and orderly! Most people with good sized yards opt for a 30-inch rake, since a bigger rake means a smaller job. Most Landscapers prefer metal rakes for lighter jobs with dry leaves, and large plastic rakes for those heavy, wet leaf bund 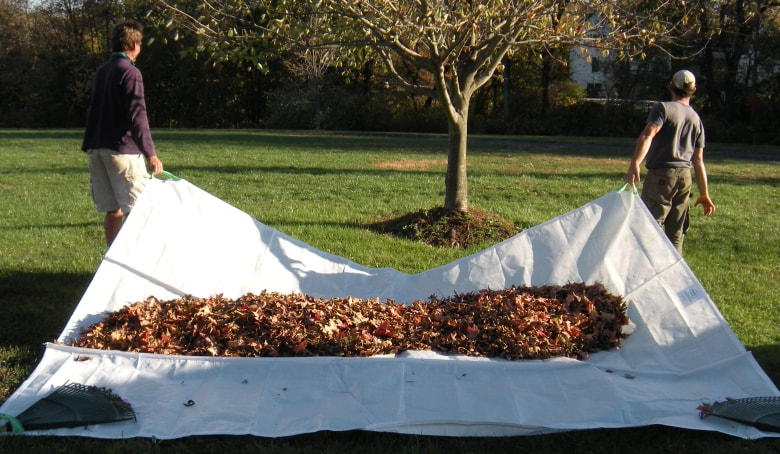 Tarps over trailers Work smarter, not harder! Carrying large barrels of wet, heavy leaves can be a hassle. Instead, drag a tarp with you to your collected leaf piles, and just rake them on, wrap it up, and you’re done! Off to the dump site you go. And even better, make it look like loads of fun and get the kids to drag it! 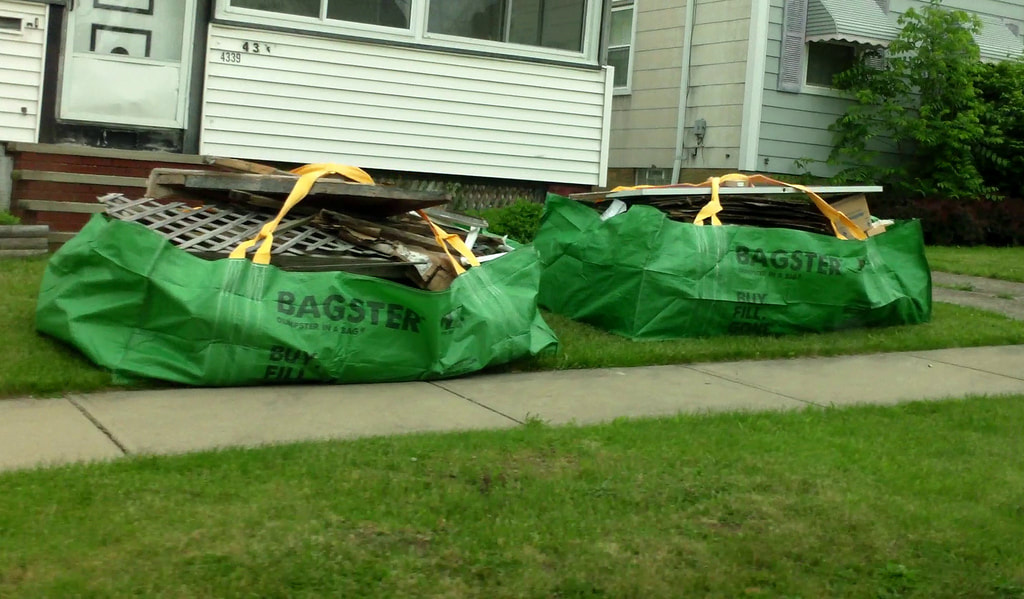 Leaf Collection If you have an excessive amount of leaves and debris on your lawn that you would like to haul to a composting site, call your local waste management to see about pick up, and opt for a Bagster! While being relatively cheap on amazon, the 606-gallon dumpster bags can hold up to 3,000 pounds of leaves and debris, and just get whisked away by the waste company! 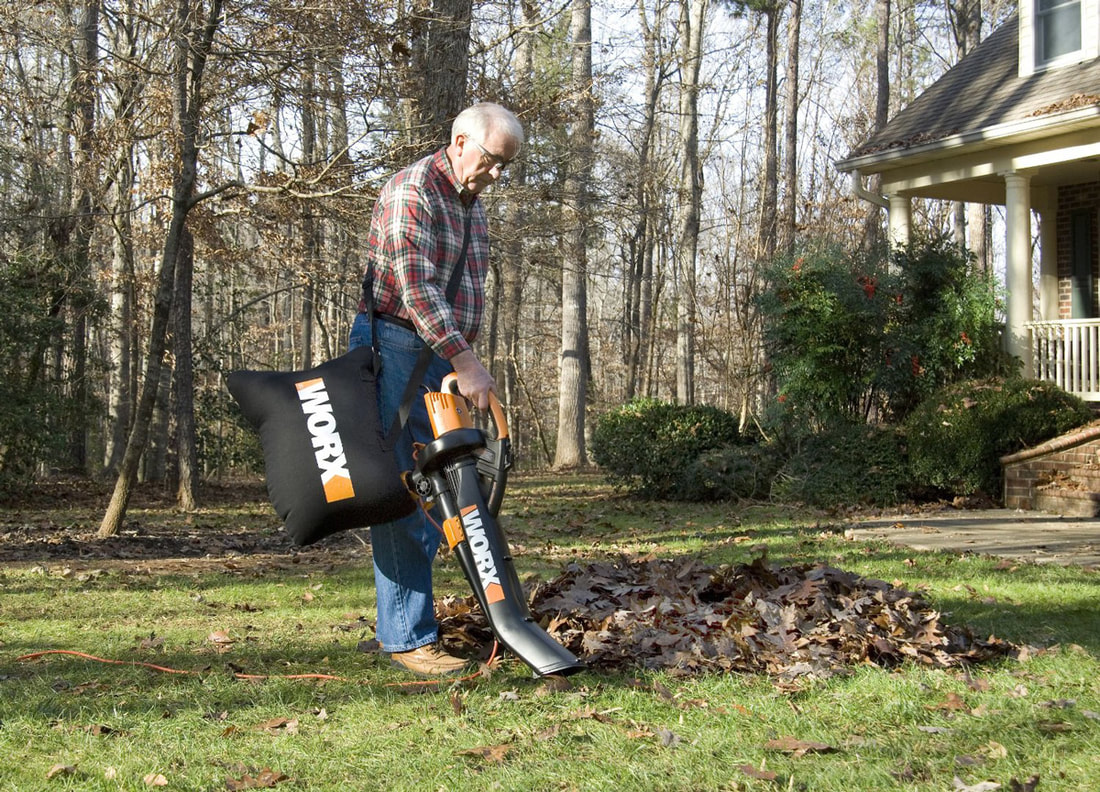 Yard Vacuum Yard Vacuums are used to suck in, shred, chip, and bag leaves and other debris that falls from trees into your yard. This saves you a lot of time, plus the added benefit of not having to do all the work of raking and bagging the leaves in your yard. Wear a dust respirator while doing this, as the shredding does throw around a lot of dust and dirt into the air. 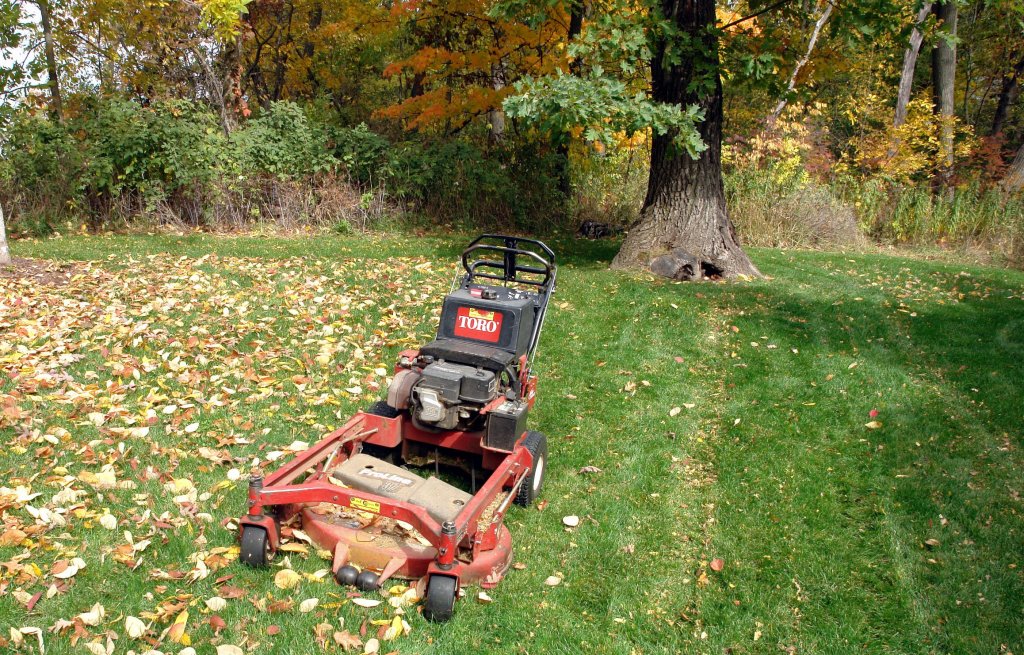 Lawn Mowers
Whether you use a mulching mower or a bag attachment, Lawn Mowers are a quick and efficient way to get rid of those pesky leaves. Mulching mowers are wonderful, pulverizing leaves and grass clipping, then dropping them back into the soil to feed the grass. If all else fails, give us a call! If booked before November 1st you’ll receive 10% off Fall services (Including leaf removal, leaf mulching, mulch installs, tree and shrub trimming, and gutter cleaning). We hope you all are enjoying this fall season Looking to shine a little light on your outdoor space? Here are some of the best and trendiest Outdoor Lighting ideas we've found! 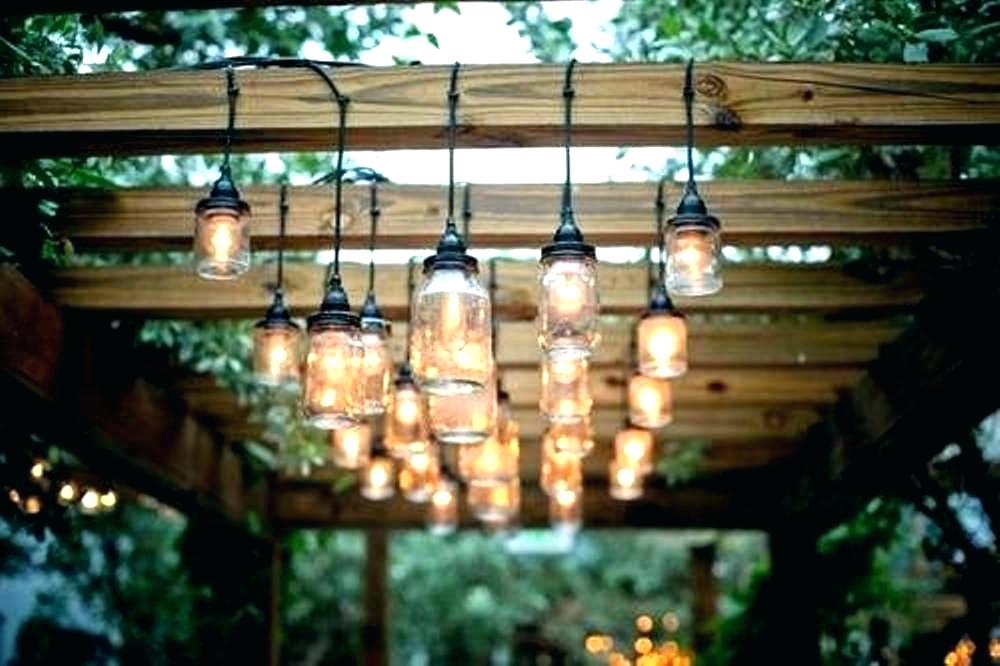 Hanging Lights hanging lights are everywhere as outdoor lighting. Lights hung from eaves and other structures provide unique lighting for decks and patios. Globe-like pendant lights hung from trees provide soft illumination. And, they’re great for social gatherings, keeping everything well-lit and offering a relaxing atmosphere. We recommend going with some vintage pieces for your lighting, giving your outdoor space some personality! In-Ground Lighting In-ground lights are popular because they're safe. No one will trip over them! They’re very versatile and can be used for guidance along a path, or for illuminating a landscaping feature. Don’t forget to be environmentally friendly and take the solar-powered option for these! In-ground lighting is also a great option for porch or patio step lighting, which looks amazing and gives added security and safety to your home.  Twinkling Lights One of our favorite trends that we’ve seen is Twinkling Lights! This is done by draping small groups of lights, like LED Christmas lights with laser tips, in and around plants. And when a breeze comes, it creates a beautiful twinkling effect. This can also be done on a larger scale with patio string lights! We recommend that LED bulbs be used instead of glass, that way the bulbs wont break if they hit against a branch. 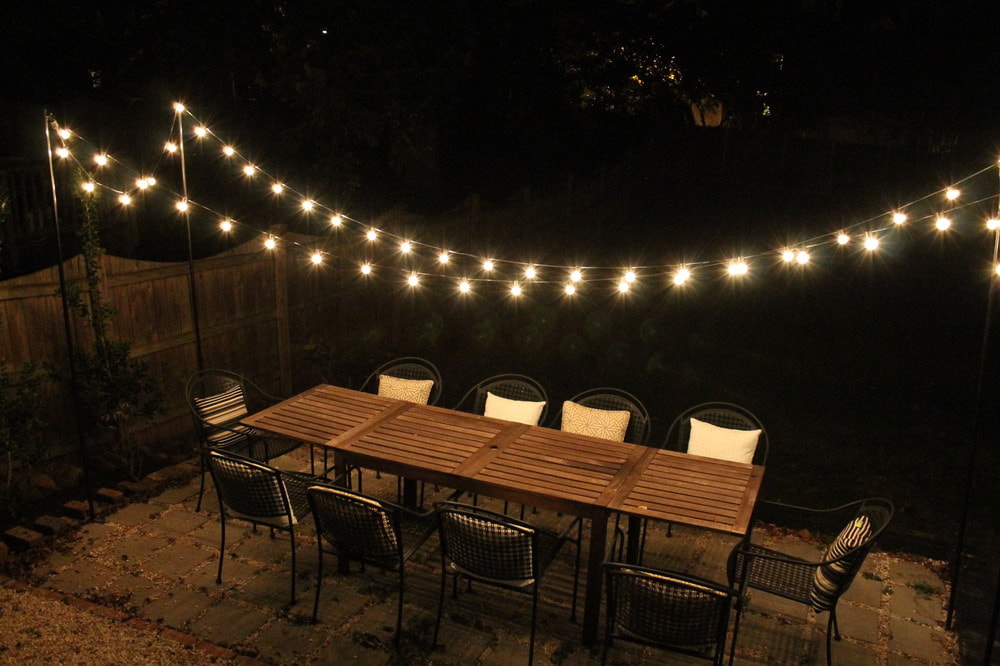 String Lights While not very durable, string lights are very flexible as far as décor goes! Whether they’re in trees around the yard, bushes around a patio, Or up on poles to give your porch an illuminated canopy-effect, we can all agree that they look adorable and give your yard a whimsical feel. 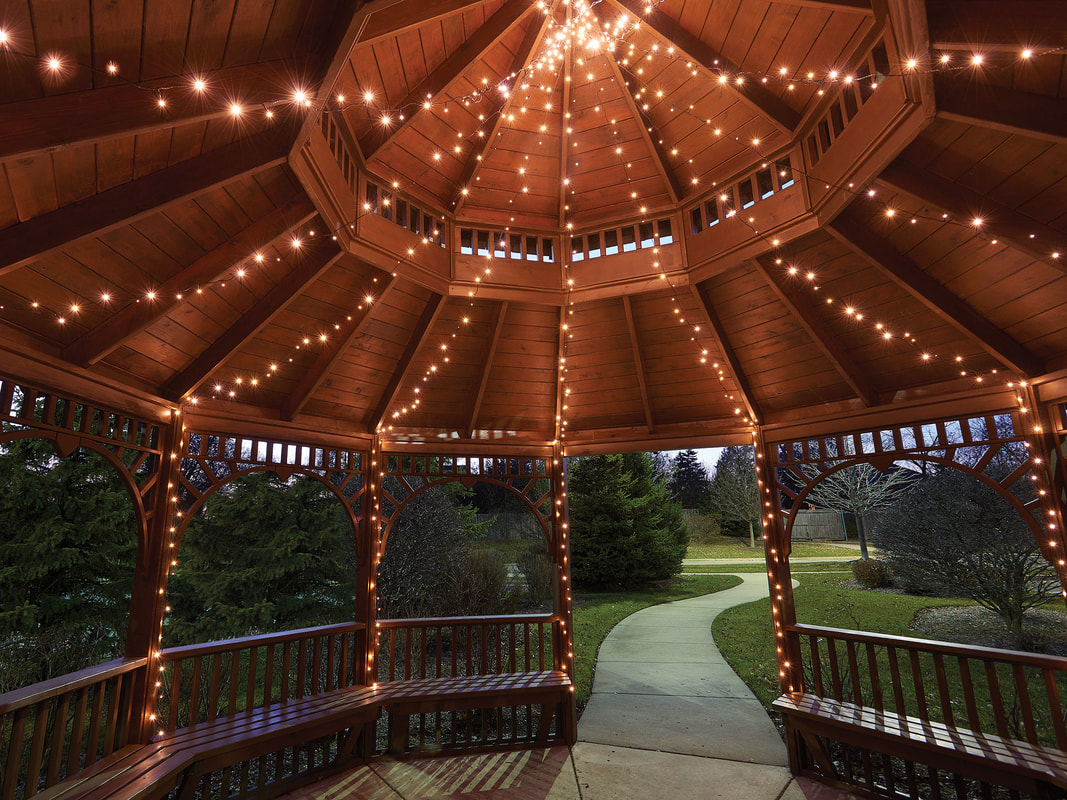 Canopy Lights
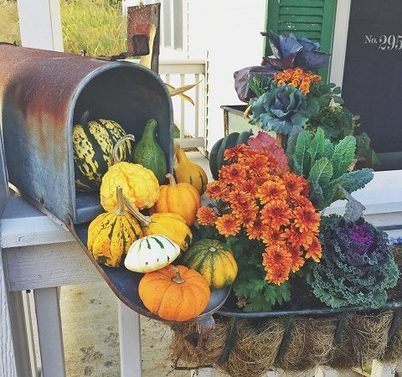
If you’re completely in love with outdoor lighting and want to go-big-or-go-home (which we love to see) Canopy Lights are going to be your best option. Strung up to appear like a circus tent of twinkling lights, they’re certainly going make your outdoor space look incredible, and impress all your house guests! Fall is here, Halloween is just around the corner, and its time to decorate! Needing ideas? Look no further. We've put together 5 ways to get your porch looking beautiful and ready for the season. 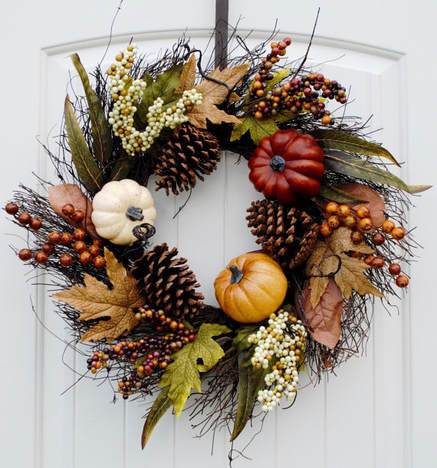 D.I.Y Wreath Get creative and make a wreath that fits your taste and home perfectly! Start with a simple grapevine wreath, then go crazy at Hobby Lobby and add some colorful leaves, flowers, faux fruit, vines, pinecones, whatever you feel is right. And don’t forget to have fun with it! 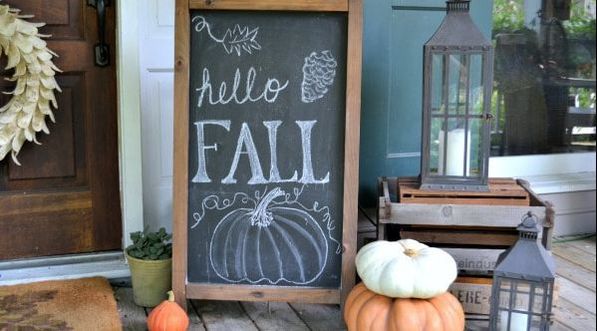 Chalkboard signs chalkboard signs are a cute and simple way to add some personal flair to your front porch fall décor. Channel your inner “artsy” with some pumpkin illustrations, friendly “I Love fall Most Of All”, or my personal favorite "Happy Fall Ya'll!" quotes, and even decorate the chalkboard itself with some leaves and flowers! 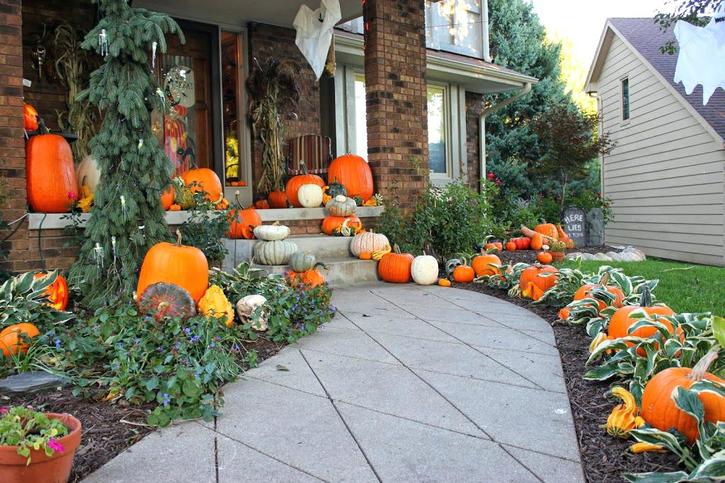 Pumpkin Patch Porch don’t be afraid to over-do it with the gourds and pumpkins. It is fall, after all! If you’re looking to try something a bit different this year, try white pumpkins to add contrast, or pastel pumpkins to add some color to your décor.  Floral Arrangements Mums, Celosia and Ornamental peppers are a fall favorite this year. And for more of a “harvest” feel, incorporate grass, corn stalks, and fall leaves to your arrangement! Pair with some cute rustic pots and planters and your front porch will be feeling fall. 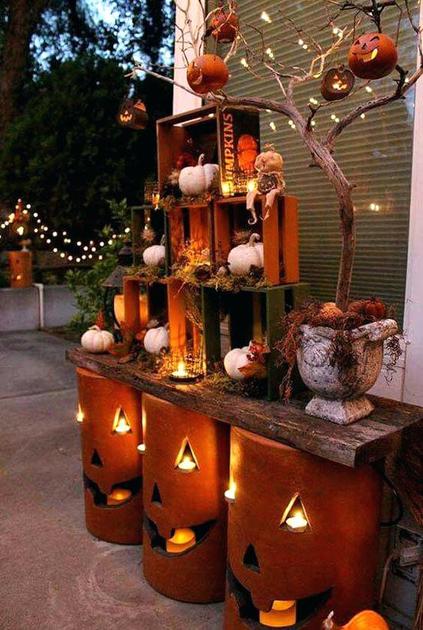 Lighting
You all know how we feel about our outdoor lighting here at Dales Lawn Service, there is no better way to increase your curb appeal then adding some outdoor lighting. And for fall, there are so many great creative ways to incorporate outdoor lighting to your porch décor. Decorative Lanterns, Jack-O-Lanterns, String lights are all great ways to shine some light on all that work you did to make your fall porch décor look amazing! Fall is a wonderful time of the year. The weather is finally cooling down, allowing for all sorts of fun activities! Here’s a list to get you started.  Build a Fire Pit There’s nothing quite like sitting around the fire pit when it’s nice and chilly outside. You can roast some marshmallows, tell some stories, and not to mention the added aesthetic a fire pit gives to your yard. There are a few ways you can go about it. You can either pick once up at the store for around $30, or head down to your local Lowes and pick up a few materials such as fire brick and concrete and build it to fit your needs!  BBQ Time! We can all agree that there may be nothing better than firing up the grill and making some delicious food, whether that be hot dogs, hamburgers, kabobs, we love it all! And this is your chance before the snow starts to fall! 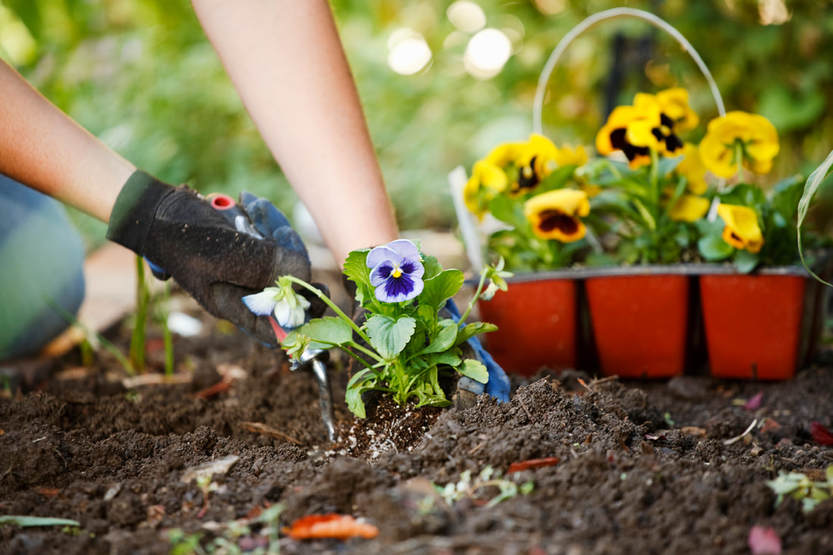 Plant Annual Flowers Spend some time in the garden this fall! Flowers such as Angelonia, Daylily (which is very pretty, and nearly impossible to kill) Pansies, and Sweet Williams are perfect to plant in early fall. 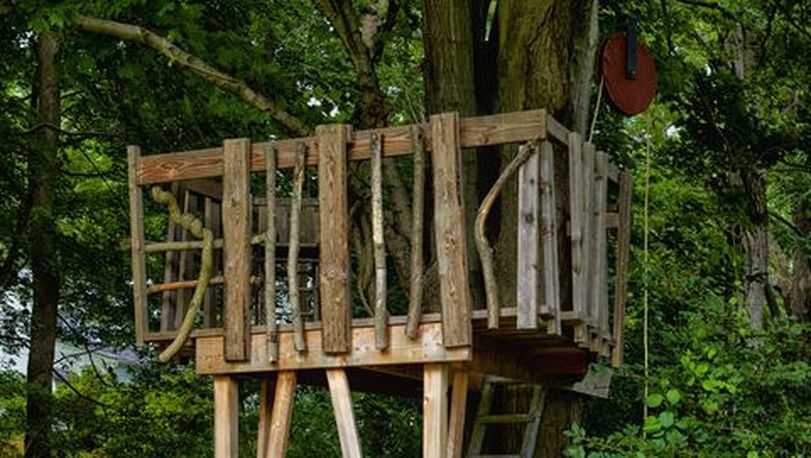 DIY Projects There are lots of fun things you can build before the snow starts to fall! You can finally build that tree house, put in a tire swing or a hammock, make a few birdfeeders with the kids, or turn an old pallet into an outdoor sofa (we’ve seen it done, and it’s wonderful.) With Pinterest at your disposal, anything is possible.
Landscaping and Decor
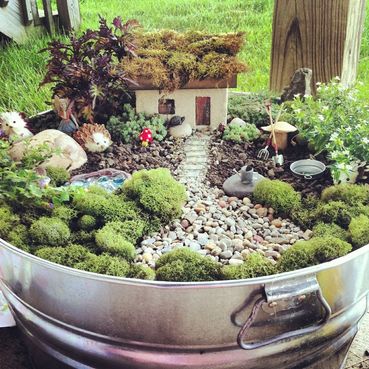
You don’t have to go all-out to add some personality to your yard! Take a trip down to Hobby Lobby and pick up a few cute outdoor decorations and give your yard a cute fall aesthetic. Plastic pumpkins, Fall Wreaths (another DIY project), and planting some flowers are great ways to get you feeling like fall! You can even get the kids involved and build a fairy garden to add a whimsical feel to your garden. A nice, green, healthy lawn is every homeowner's goal. Whether you're having a Sunday barbecue, a get-together, or relaxing around the fire pit in the evening with your family, its important that your lawn is healthy and you have that lovely "barefoot" lawn! Here are 5 tips to help you achieve it! 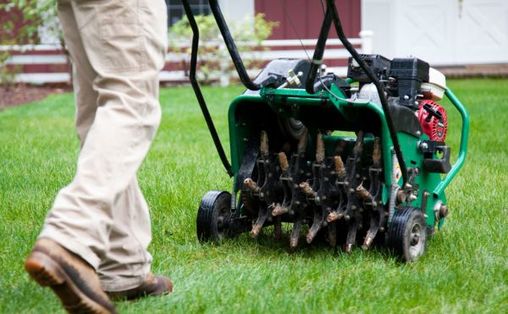 Aeration! Aeration involves piercing the soil with small holes which allow air, water and nutrients to get to the grass roots. This helps the roots grow deeply and produce a stronger, more vigorous lawn. Aeration is done mainly to alleviate compact soil. 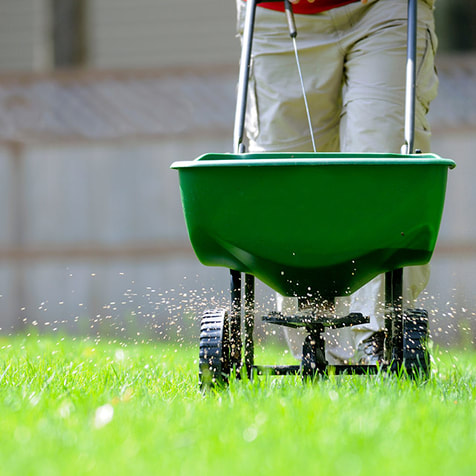 Over-seeding! Overseeding newer turfgrass into an older lawn can help it better withstand insects, disease, drought. the best time to seed your lawn in Missouri is in the fall, from late August to mid-October with early September being the ideal time. During this time of year, the soil is warm, so grass seed germinates faster, and the cool temperatures favor the growth of cool-season grasses. 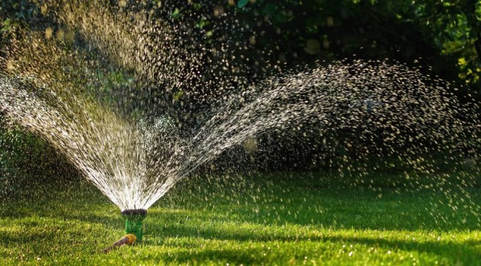 Watering! Before 10 a.m. is the best time for your lawn to be watered. It's cooler and winds are calmer, so water can soak into the soil and be absorbed by the grass roots before it can evaporate. The later you water, the greater chance of disease becoming widespread in your lawn. 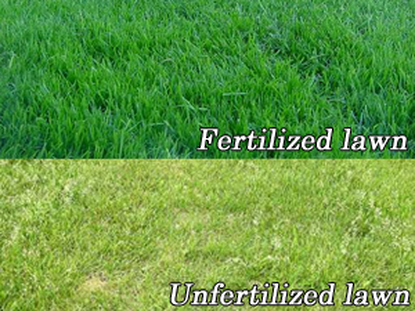 Fertilizing! Your soil supplies some of the nutrients that turfgrass needs, but most soils are not able to provide all of them during the entire growing season. A healthy and actively growing lawn uses a great deal of energy. Fertilizer helps your lawn stay healthy by promoting new leaf and root growth. But while your grass is trying to grow, so are the weeds. If you spread a fertilizer which has a weed remover in it, it will provide the nutrients your lawn needs, and control weed growth as well.  Weed Control!
Before you start any weed control program, you need to determine which of the three types of weeds you’re controlling. Each requires unique products and application methods. Some treatments are very time sensitive, while others can be done anytime during the growing season. Fall is almost here! And that means it's almost time to start setting up the perfect fall decor, and sprucing up our gardens to add to our autumn aesthetic! Here are 5 flowers that are guaranteed to get your garden turning heads this season...  Mums Mums are one of the prettiest varieties of perennials that start blooming early in the autumn, and are known as the favorite flower for the month of November. Mums can come in festive shades of red, orange, yellow, peach, and white, as well as contrasting shades of pink. Because of their popularity, you can find these fall flowers in a wide variety of sizes. Look for dainty mini-mums in tiny 2-inch-wide pots (perfect for table decor) or giants that can grow a couple of feet across. And if paired with a few pumpkins, makes for the perfect fall decor!  Croton Croton is an ideal autumn addition. It can be a houseplant in cold-weather regions, or a shrub in frost-free areas, it also grows well as an annual. With beautiful multi-colored leaves, It adds rich shades of red, orange, yellow, and purple to your home, and draws the eye like month to a flame.  Witch Hazel Witch Hazel is an excellent fall-time addition to your garden! They are popular ornamental plants, grown for their clusters of rich yellow to orange-red flowers. Witch Hazel is an annual bloom, and usually peaks with its brightest colors between mid-October to mid-November. Not to mention, it smells lovely!  Celosia Durable and easy to care for, celosia is a natural for fall because many varieties appear in the traditional color palette. Celosia provides bright yellow, warm orange, scarlet red, and deep burgundy purple accents. Plus, the flame-like plumes of bloom add fun texture to other fall flowers! 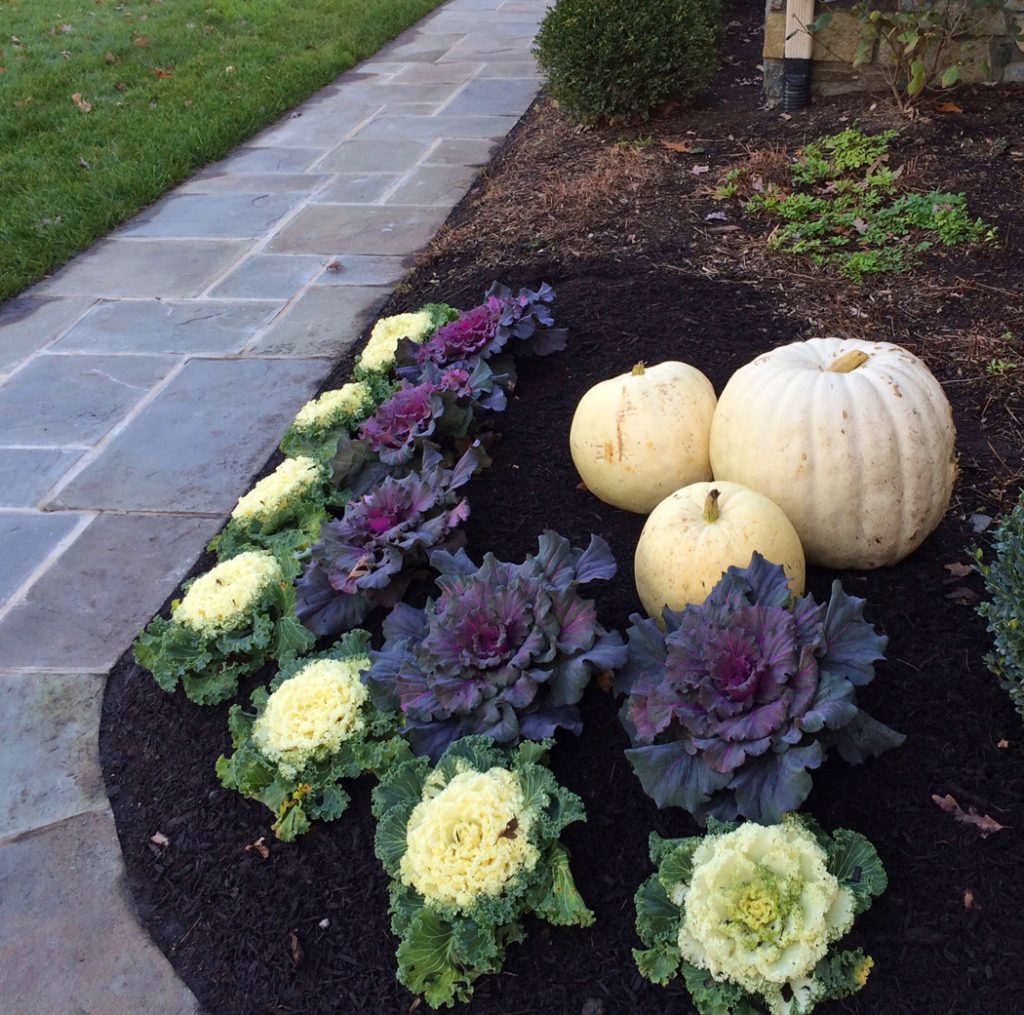 Ornamental Kale
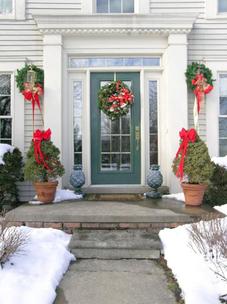
Ornamental kale was developed for their bright, vivid colors. It thrives in cool temperatures and requires very minimal care. If planted in early fall, it produces rich color throughout the season; and color will intensify with the first few touches of frost. Leaves range from pink and purple to green and white, and leaf shape can be ruffled, flat, or curly. Pair with a few decorative white gourds for a lovely contrast in your fall decor! Today we’re going to be talking about how to increase the curb appeal of your home! There are so many small, inexpensive ways you can take to give your home a fresh look, and we’ll be giving you 5 steps to get started.  Paint your door! The entry point into your home is one of the most important ways to enhance your home’s curb appeal. Every visitor will see your door, so be sure to keep it looking nice. A fresh coat of paint in a bold color gives your home lots of personality and is sure to make your home the prettiest one on the block! And when you’re done, don’t forget to add a wreath or swag to your door that will complement the interior 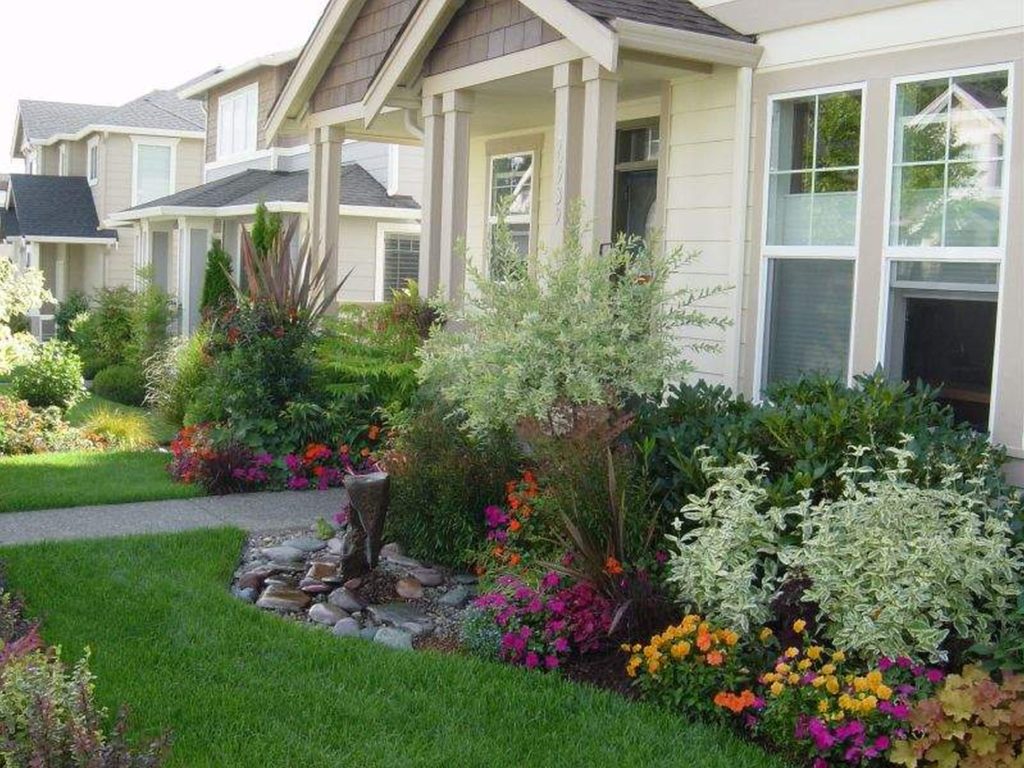 Landscaping! Getting some pretty shrubs, flowers, and other various mixes of greenery put in will give your yard a lovely textured look and add a lot of color. Find flowers that compliment the color of your home! And with the addition of some colored mulch around your flower beds, color that has been taken away because of weather and sunlight will be restored, and your yard will become a real eye-catcher.  Lawn Maintenance! Even with the prettiest flowers and decor, in the end, a well-maintained yard and properly trimmed grass is really what’s going to do it. Keeping the shrubs shaped, weeds pulled, and grass cut evenly and correctly will go a very long way in making sure that your home looks absolutely perfect! 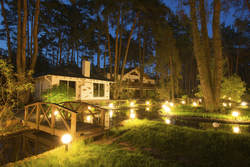 Shine some light on your yard! Solar-powered outdoor lights are a great way to add charm to your yard, and really compliment all the hard work put into your landscaping. Not to mention, the added benefit of safety and security.  Paint your house!
We know that’s a lot easier said then done, but a fresh coat paint in a lively, bright color of your choosing will go a long way in making your home stand out from the rest and look fabulous while doing so! 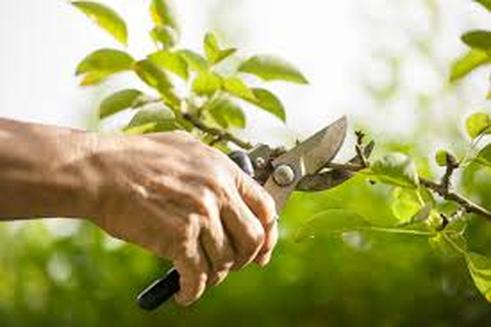 Knowing how to properly prune your trees can enhance your landscape curb appeal. While I'm out servicing properties, I see so many trees pruned improperly. This can hurt your curb appeal, and cause unwanted disease. The most common mistake I see out in the field is improper cuts, or over pruning. So in this blog I'm going to walk you through how to prune a tree the proper way. To start off on any pruning job you will need to determine what pruning method needs to take place. There are two types of pruning, thinning and raising the canopy. These are two basic methods that any home owner can tackle as a DIY, with just a little bit of research, and a few tools. Here is a list of tools needed:
The third mistake I see people making is improper cuts. Often I see the cuts too close to the bark ridge, or too far from the branch collar. I also see people pruning the tree in the right spot but still doing it incorrectly. By this I mean, pruning in the right spot but only making one cut and leaving the branch too long and causing it to rip away from the tree and causing wounds. To properly make a cut, you will want to practice a 3 cut method as shown in the diagram below. 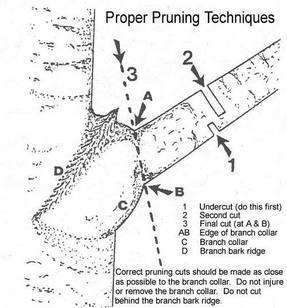 Now, lets talk about tree thinning. Thinning is a process where you take selective branches and cut them out to increase light penetration, air movement, and tree structure. The most common mistake I see with thinning is over pruning. People taking too much off at once. It is better to under prune then over prune. Cutting too much can lead to decaying. Any cut on a tree is a wound that must be healed. The fewer cuts, the better. Over pruning can also lead to reduced food storage, decreased tip growth, as well as increase the chance of sun injury. The second most common mistake I see is timing of thinning. Timing has a huge factor on how the tree heals. The best time I would recommend to properly prune your tree is in the fall, or late winter. While the tree is in its dormant stage it will put less stress on the tree and give it plenty of time for recovery. Check out the photo below on a example of a proper thinning. 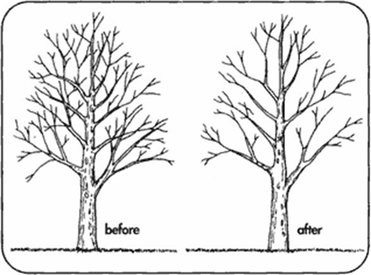 A good rule of thumb when it comes to pruning is: don't take off more then 1/3rd of the tree. After reading this article, if you're still not sure if you can tackle your tree pruning yourself, make sure you call a professional. Just because your neighbor has a chainsaw and a truck, doesn't mean he knows what he is doing.
I will be taking you back on a journey of our 2017 season. It was a great year and we had a lot of support. We would like to thank everyone that has supported us throughout the years.
Check out our new Vlog for aerating and over-seeding. We will be talking about the benefits of this process. Hope this video helps you out and if you have any questions please feel free to email us at [email protected]
 Pruning in the winter doesn’t sound like a project that most people would want to take on. Some might say that pruning in the winter is bad for the plant or that it is too cold, but pruning at the right time in the winter could be beneficial for your plants and shrubs. You might be thinking, “When is the right time to prune in the winter?” Actually, late winter is the best time to prune plants, shrubs, and rose bushes. When is late winter? Here in southern Missouri, at Dale’s Lawn Service, we like to say late winter is from the beginning of February up to the end of the second week of February, depending on the temperatures. This is when we like to start pruning those roses and trimming the shrubs. The garden is still dormant at this time but the spring thaw is only four to six weeks away. Any late winter pruning should be done before spring budding begins. Need to know what to prune at this time of year? Great! I have put a list together for you.
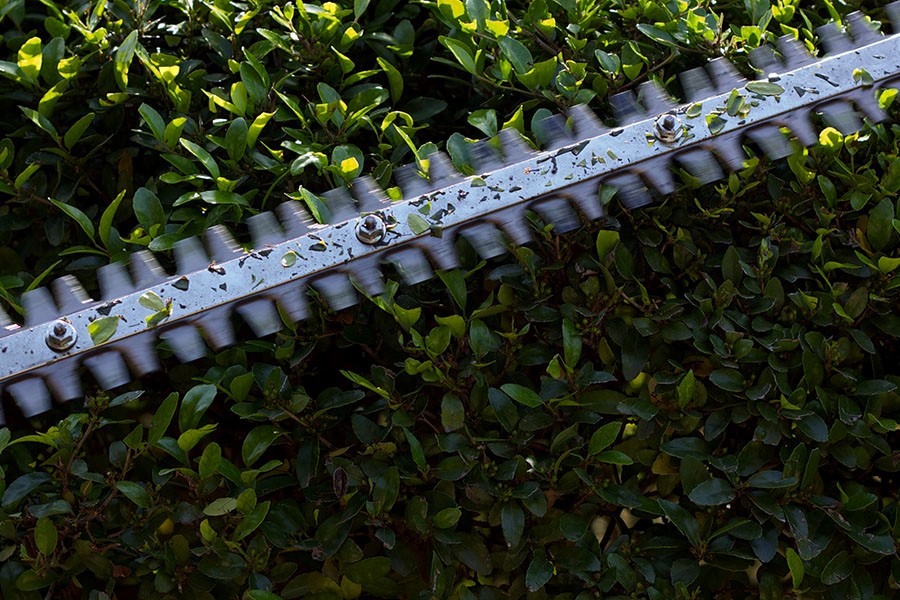
Tools You really don’t need anything big or super expensive for pruning. There are so many options to choose from, from manual “muscle” powered tools to gas or electric powered. At Dale’s Lawn Service, we use four different tools for pruning. We use gas powered hedge trimmers, a gas powered pole saw, hand pruners, and loppers. It is important to know each tool and how they work, as well as what they can and cannot cut for ease of use. Not every job will need a gas powered or electric hedge trimmer, as some jobs demand a hand pruner and anything else would be overkill or simply just won’t work as well. The most important thing is picking the right tools for your pruning job and then making sure they are sharp, and rust free. Homeowners typically can get by just sharpening the tools once a season, depending on usage. Check out the list of tools and when to use guide below.
So why prune in late winter? Pruning in late winter when many shrubs and trees are dormant will give strength and energy for profuse growth in the spring. The wounds from pruning are only unprotected for a short amount of time before the new growth starts, and they will be less susceptible to any diseases because of this. The best part about pruning in the late winter it is easier to see what needs to be prune without all of the foliage or blooms being in the way. Always call a professional out when branches are not able to be reached safely, or if you are unsure what to prune, as you don’t want to risk hurting yourself or the plants. If in doubt, call a local landscape or tree company, as many will share their skill and knowledge with you, and most companies offer free estimates. For more ways to improve your home's landscaping and curb appeal, and get ready for the spring season, check out this article! 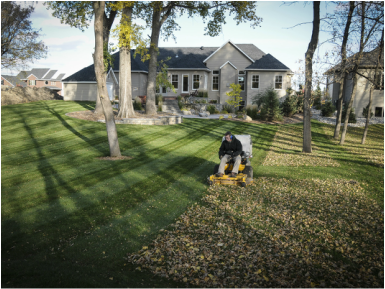 The best way to a nice green, thick, and healthy lawn in the spring is the work that is put into the lawn in the fall. Fall is a great time of the year in the Ozarks. Nice cool weather, tree’s changing colors, and pumpkin pies. The fall can also be a busy time of the year for lawn maintenance, and not sticking to a schedule can result in an unhealthy lawn in the spring. Here is some tips for this fall so you don’t make any mistakes before the lawn goes dormant.
Remove the leaves: This is a job that most people don’t like, or have time to do. Leaving the leaves on the lawn can cause mold, fungus, block sunlight, and diseases that can wipe out a lawn in 1 to 2 years. There are two methods of removing the leaves. You can rake them up or mulch them using a mower, this method adds nutrients to the lawn. Aerating and Over seeding: Aerating the lawn opens up the lawn to breathe better and to allow the nutrients to get to the roots. Doing this will also help against grass and soil compaction. Some people wait till the spring to do this but doing that will leave an opportunity for weed seeds to germinate. Over seeding in the fall is the best time of the year due to the ground is warmer, cool nights and not so hot days. Over seeding will provide a thick lawn which will be harder for weeds to germinate and have great curb appeal. Fertilize: Using a fall fertilizer in the fall will give your lawn a jump start in the spring if applied at the right time. Best time to do this is Mid-September till Mid-October. Fertilizing in the fall will give your lawn the nutrients it needs to survive the winter months. It will help fall and winter color, and fall and spring root growth. Mowing: Grass will continue to grow till the first frost of the season. Cutting at the right height in the fall can avoid many problems through winter and spring. It is recommended to mow at a height of 2 ½ to 3 inches. Some people wants to skip the last few mows of the season thinking that they will take care of it in the spring. Taller grass in the winter can cause a fungi known as snow mold. Also be careful to not mow the lawn too short as this could cause damage to the roots. Damage to the roots this time of year can have a major effect for fighting against winter coldness and dryness. If you find yourself not having the time or ability to manage your fall lawn care a local lawn care company can help you. Many lawn care companies offer weekly services, and have the equipment to get these jobs done in a quickly manner. If you hire a local lawn care company this fall make sure they are licensed in the area you are located, have insurance, good reviews and check references. The most important part for lawn maintenance in the fall is to get everything done in a timely manner. Remember, a beautiful lawn doesn’t happen by itself. |
Archives
February 2022
Categories
All
If you are looking for a lawn care or lawn mowing company in the Nixa or Springfield, MO area, we would love to have the opportunity to earn your business.
Already one of our current customers? Show us some love with a review or positive comment on our Thumbtack page! |


 RSS Feed
